This is the full developer documentation for BTC Direct
# BTC Direct developer docs
> Integrate cryptocurrency buy (fiat-to-coin) and sell (coin-to-fiat) services into your platform.
[ Unified Checkout Redirect-based integration with minimal development effort. Authenticate, create a checkout URL, redirect the user. ](/unified-checkout/)[ Widget Embeddable components for your website. More control over the user experience while BTC Direct handles the order flow. ](/widget/getting-started/)[ API Full control over the UI and UX. Direct access to all endpoints for quotes, orders, users, and payments. ](/api/)[ Supported currencies 50+ cryptocurrency pairs against EUR. Bitcoin, Ethereum, Solana, and many more.](/general/currencies/)
# API documentation
Welcome to the official API documentation for BTC Direct. This page provides all the necessary information to help you integrate seamlessly with our platform. Here, you’ll find details on obtaining API credentials, using the API, and accessing different versions of our endpoints.
## Introduction
[Section titled “Introduction”](#introduction)
The BTC Direct API provides a suite of tools to integrate cryptocurrency services into your platform. From buying and selling digital assets to managing users, our API supports a wide variety of use cases. This documentation serves as a guide to help you understand how to work with our API and get started quickly.
This documentation is used when you want to integrate our services into your platform. If you are looking for a way to buy or sell cryptocurrency, please visit our website at [btcdirect.eu](https://btcdirect.eu).
This guide has been written for developers and partners that wish to integrate with BTC Direct using our API services. If you are looking to integrate with our Unified Checkout or Widget services, please refer to the [Unified Checkout](/unified-checkout/) or [Widget](/widget/getting-started/) documentation.
## Obtaining API credentials
[Section titled “Obtaining API credentials”](#obtaining-api-credentials)
To obtain your API credentials, you will need to contact your account manager.
Once you have your credentials, you can begin making requests to our API endpoints. Use your credentials securely and never expose them in client-side code.
## API environments
[Section titled “API environments”](#api-environments)
| Environment | Base URL |
| ----------- | ---------------------------------- |
| Production | `https://api.btcdirect.eu` |
| Sandbox | `https://api-sandbox.btcdirect.eu` |
## API versions
[Section titled “API versions”](#api-versions)
The API has two versions. V2 is the newer version with improved endpoints. When integrating, you will typically use a combination of both:
* **V1**: authentication, user management, sell flow, system information.
* **V2**: buy checkout, payment methods, prices, offers.
Both versions use the same base URL and authentication mechanism.
## Error responses
[Section titled “Error responses”](#error-responses)
When a request fails, the API returns an HTTP 400 status code with a JSON body containing the error details:
```json
{
"errors": {
"ER325": {
"code": "ER325",
"message": "Wallet address is required.",
"solution": "Provide a valid wallet address in the request."
}
}
}
```
Each error includes a unique error code (e.g. `ER325`), a human-readable message, and a suggested solution. The full list of error codes per endpoint is available in the OpenAPI specification.
## OpenAPI specification
[Section titled “OpenAPI specification”](#openapi-specification)
The full OpenAPI (Swagger) specification is available as JSON for each API version:
| Version | Production | Sandbox |
| ------- | ---------------------------------------------------------------------------- | -------------------------------------------------------------------------------------------- |
| V1 | [api.btcdirect.eu/api/v1/doc.json](https://api.btcdirect.eu/api/v1/doc.json) | [api-sandbox.btcdirect.eu/api/v1/doc.json](https://api-sandbox.btcdirect.eu/api/v1/doc.json) |
| V2 | [api.btcdirect.eu/api/v2/doc.json](https://api.btcdirect.eu/api/v2/doc.json) | [api-sandbox.btcdirect.eu/api/v2/doc.json](https://api-sandbox.btcdirect.eu/api/v2/doc.json) |
You can also browse the specification interactively via the [V1](/api/v1/) and [V2](/api/v2/) pages.
## FAQ and support
[Section titled “FAQ and support”](#faq-and-support)
If you encounter any issues or have questions, don’t worry! Your account manager will be happy to help you with any questions you may have.
Answers to common questions can be found in the [FAQ page](/general/faq/).
# Client authentication
To work with the BTC Direct API, you need a JWT token. Request one using your partner credentials via the [`POST /api/v1/authenticate`](/api/v1/operations/post_app_v1_authentication_authenticate_authenticate/) endpoint.
## Authenticating
[Section titled “Authenticating”](#authenticating)
```bash
curl -X POST https://api-sandbox.btcdirect.eu/api/v1/authenticate \
-H "Content-Type: application/json" \
-d '{"username": "YOUR_USERNAME", "password": "YOUR_PASSWORD"}'
```
| Field | Type | Required | Description |
| ---------- | ------ | -------- | --------------------- |
| `username` | string | yes | Your partner username |
| `password` | string | yes | Your partner password |
Response:
```json
{
"token": "eyJ...",
"refreshToken": "abc123..."
}
```
Try it out
Authenticate with your partner credentials to get a JWT token.
Base URL Sandbox (api-sandbox.btcdirect.eu) (https\://api-sandbox.btcdirect.eu) Request body {
"username": "YOUR\_USERNAME",
"password": "YOUR\_PASSWORD"
}
POST /api/v1/authenticate Copy as curl
Response
```
```
Include the token as a header in all subsequent requests:
```plaintext
Authorization: Bearer {token}
```
## Token expiry
[Section titled “Token expiry”](#token-expiry)
Tokens are valid for 1 hour. If your token has expired, the API returns error `ER801`. You can request a new one by sending the refresh token to [`POST /api/v1/refresh`](/api/v1/operations/post_app_v1_authentication_refreshtoken_refresh/):
```bash
curl -X POST https://api-sandbox.btcdirect.eu/api/v1/refresh \
-H "Content-Type: application/json" \
-d '{"refreshToken": "YOUR_REFRESH_TOKEN"}'
```
Response:
```json
{
"token": "eyJ...",
"refreshToken": "def456..."
}
```
Try it out
Refresh an expired token using your refresh token.
Base URL Sandbox (api-sandbox.btcdirect.eu) (https\://api-sandbox.btcdirect.eu) Request body {
"refreshToken": "YOUR\_REFRESH\_TOKEN"
}
POST /api/v1/refresh Copy as curl
Response
```
```
The refresh token is valid for 1 month. That validity period resets each time you use it to request a new token.
Caution
Always authenticate from your backend. Never expose your credentials in frontend code.
# Error codes
When a request fails, the API returns an HTTP 4xx status code with a JSON body containing one or more error details:
```json
{
"errors": {
"ER325": {
"code": "ER325",
"message": "Wallet address is required.",
"solution": "Provide a valid wallet address in the request."
}
}
}
```
Each error includes a unique code, a human-readable message, and a suggested solution. The full list of error codes per endpoint is available in the OpenAPI specification ([V1](/api/v1/), [V2](/api/v2/)).
## Authentication errors (ER8xx)
[Section titled “Authentication errors (ER8xx)”](#authentication-errors-er8xx)
| Code | Message | Solution |
| ------- | ----------------------------------------- | --------------------------------------------------------------------------------------- |
| `ER800` | Authorization token is invalid. | Check the token format and value. |
| `ER801` | Authorization token has expired. | [Refresh the token](/api/client-authentication/#token-expiry) using your refresh token. |
| `ER802` | Authorization token not found. | Include the `Authorization: Bearer {token}` header. |
| `ER803` | Multiple authentication methods provided. | Use either a JWT token or an API key, not both. |
| `ER805` | API key is invalid. | Check your API key value. |
| `ER806` | User authorization token is invalid. | Check the user token or re-authenticate the user. |
## Rate limiting (ER920)
[Section titled “Rate limiting (ER920)”](#rate-limiting-er920)
| Code | Message | Solution |
| ------- | ------------------ | ----------------------------------------------------------- |
| `ER920` | Too many requests. | Wait before retrying. See [rate limits](/api/rate-limits/). |
## Validation errors (ER0xx, ER3xx)
[Section titled “Validation errors (ER0xx, ER3xx)”](#validation-errors-er0xx-er3xx)
These errors indicate invalid or missing fields in your request. Common examples:
| Code | Message | Solution |
| ------- | ------------------------------------ | ---------------------------------------------------------------------------------------------------- |
| `ER038` | Bad credentials. | Check your username and password. |
| `ER300` | Invalid KYC share token. | Provide a valid SumSub share token string. |
| `ER314` | expireTime should be an int or null. | Pass an integer (seconds), not a string. |
| `ER325` | Wallet address is required. | Include a `walletAddress` in the request. |
| `ER326` | Invalid currency pair. | Use a valid pair from the [currency pairs endpoint](/unified-checkout/retrieving-currencies/). |
| `ER327` | Invalid payment method. | Use a valid code from the [payment methods endpoint](/unified-checkout/retrieving-payment-methods/). |
| `ER328` | Client not found. | Check your authentication token. |
| `ER329` | Invalid expire time. | `expireTime` must be between 3600 (1 hour) and 86400 (24 hours). |
| `ER332` | Payment method is required. | Include `paymentMethod` in the request body. |
## Order errors (ER9xx)
[Section titled “Order errors (ER9xx)”](#order-errors-er9xx)
| Code | Message | Solution |
| ------- | -------------------------- | ------------------------------------------------------------- |
| `ER900` | Quote has expired. | Request a new quote. |
| `ER901` | Quote is invalid. | Request a new quote. The quote string may have been modified. |
| `ER999` | An unknown error occurred. | Contact your account manager with the request details. |
## CAIP-19 errors (ER4xx)
[Section titled “CAIP-19 errors (ER4xx)”](#caip-19-errors-er4xx)
| Code | Message | Solution |
| ------- | -------------------------- | ----------------------------------------------------------- |
| `ER401` | Invalid source currency. | Check the `sourceCurrency` CAIP-19 identifier. |
| `ER402` | Invalid target currency. | Check the `targetCurrency` CAIP-19 identifier. |
| `ER403` | Source currency not found. | The CAIP-19 identifier does not match a supported currency. |
## HTTP status codes
[Section titled “HTTP status codes”](#http-status-codes)
| Status | Meaning |
| ------ | -------------------------------------------------------- |
| `200` | Success. |
| `400` | Bad request. Check the error codes in the response body. |
| `401` | Unauthorized. Authentication failed or token expired. |
| `429` | Too many requests. Rate limit exceeded. |
| `500` | Server error. Contact your account manager. |
# Quote security
When placing an order via the API, a quote must first be requested. The quote system is designed to prevent tampering with prices and order details.
## How the quote flow works
[Section titled “How the quote flow works”](#how-the-quote-flow-works)
1. Request a quote from one of the quote endpoints ([buy](/api/v1/operations/post_app_v1_buy_quote_quote/) or [sell](/api/v1/operations/post_app_v1_sell_quote_quote/)).
2. The API returns the quoted price, fees, expiry time, and an encrypted `quote` string.
3. Display the quote to the user for confirmation.
4. If the user accepts, send the `quote` string to the corresponding confirm endpoint ([buy confirm](/api/v1/operations/post_app_v1_buy_confirm_confirm/) or [sell confirm](/api/v1/operations/post_app_v1_sell_confirm_confirm/)).
## Validation
[Section titled “Validation”](#validation)
When you submit the quote string to the confirm endpoint, the API validates:
* The quote has not been tampered with.
* The quote has not expired.
* The quote belongs to the wallet address provided.
* The quote belongs to the authenticated API client and user.
If all checks pass, the order is placed.
## Encryption
[Section titled “Encryption”](#encryption)
The quote string is a [JWE token](https://tools.ietf.org/html/rfc7516) (JSON Web Encryption), encrypted with strong encryption to ensure integrity, authenticity, and confidentiality. Even if the token were decrypted, modified, and re-encrypted, the API performs additional server-side checks that would reject it.
Note
The `quote` string in API response examples is abbreviated for readability. The actual string is significantly longer.
# Rate limits
The API enforces rate limits to prevent abuse and ensure consistent performance for all users.
## What happens when the limit is exceeded
[Section titled “What happens when the limit is exceeded”](#what-happens-when-the-limit-is-exceeded)
If you exceed the rate limit, the API returns HTTP status code `429` with error code `ER920`:
```json
{
"errors": {
"ER920": {
"code": "ER920",
"message": "Too many requests.",
"solution": "Wait before retrying."
}
}
}
```
## Avoiding rate limits
[Section titled “Avoiding rate limits”](#avoiding-rate-limits)
If you are concerned about approaching the rate limit, contact your account manager for assistance. They can review your usage patterns and adjust limits if needed.
# User authentication
Endpoints that operate on behalf of a user (viewing orders, managing wallet addresses, placing orders) require user-level authentication in addition to [client authentication](/api/client-authentication/).
There are two ways to authenticate a user: email/password login or a user identifier header.
## Option 1: Email and password
[Section titled “Option 1: Email and password”](#option-1-email-and-password)
Let the user log in via [`POST /api/v1/user/login`](/api/v1/operations/post_app_v1_user_login_login/):
```bash
curl -X POST https://api-sandbox.btcdirect.eu/api/v1/user/login \
-H "Content-Type: application/json" \
-H "Authorization: Bearer PARTNER_TOKEN" \
-d '{"email": "user@example.com", "password": "user_password"}'
```
Response:
```json
{
"token": "eyJ...",
"refreshToken": "abc123...",
"identifier": "b959356546fca..."
}
```
Try it out
Log in a user with email and password. Requires a valid partner JWT token.
Base URL Sandbox (api-sandbox.btcdirect.eu) (https\://api-sandbox.btcdirect.eu) Authorization (partner JWT token) Bearer eyJ... Request body {
"email": "user\@example.com",
"password": "user\_password"
}
POST /api/v1/user/login Copy as curl
Response
```
```
Include the user token alongside the partner token in all user-level requests:
```plaintext
Authorization: Bearer {partner_token}
User-Authorization: Bearer {user_token}
```
The user token is valid for 1 hour and can be refreshed the same way as the partner token, by sending the refresh token to [`POST /api/v1/refresh`](/api/v1/operations/post_app_v1_authentication_refreshtoken_refresh/).
To log a user out and invalidate their token, call [`POST /api/v1/user/logout`](/api/v1/operations/post_app_v1_user_logout_logout/).
## Option 2: User identifier
[Section titled “Option 2: User identifier”](#option-2-user-identifier)
You can send a unique identifier header (e.g. a hashed XPUB key) to authenticate a user without email/password:
```plaintext
User-Identifier: {userIdentifier}
```
You can use this identifier in all requests that require a logged-in user. However, to confirm quotes and perform user-specific operations (such as retrieving user info), the identifier must be linked to a user account.
To link a user identifier to an account, call [`POST /api/v1/user/register-identifier`](/api/v1/operations/post_app_v1_user_registeridentifier_registeruseridentifier/). This returns either a registration URL (for new users) or a dashboard URL (if the identifier is already linked).
## User management endpoints
[Section titled “User management endpoints”](#user-management-endpoints)
* [`POST /api/v2/user`](/api/v2/operations/post_app_v2_user_user_register/): register a new user
* [`GET /api/v1/user/exists`](/api/v1/operations/get_app_v1_user_exists_exists/): check if a user exists
* [`GET /api/v1/user/info`](/api/v1/operations/get_app_v1_user_info_info/): get user details
* [`POST /api/v1/user/identity-document`](/api/v1/operations/post_app_v1_user_identitydocument_create/): submit identity document
* [`POST /api/v1/user/reset-password`](/api/v1/operations/post_app_v1_user_resetpassword_requestpasswordresetemail/): request password reset
# General information
This section covers the fundamentals that apply across all BTC Direct integration methods: Unified Checkout, Widget, and API.
Before you start integrating, familiarize yourself with the currencies we support, the payment methods available to your users, and the wallet address requirements.
## Key topics
[Section titled “Key topics”](#key-topics)
* **[Payment methods](/general/payment-methods/)**: which payment methods are available and how to discover them via the API.
* **[Supported currencies](/general/currencies/)**: all cryptocurrency pairs, fiat currencies, and chain information.
* **[Wallet addresses](/general/wallet-addresses/)**: address formats per chain, validation rules, and when a wallet address is required.
* **[CAIP-19 support](/general/caip19/)**: how to use CAIP-19 identifiers as an alternative to currency codes.
* **[Webhooks](/general/webhooks/)**: receive real-time order and user event notifications.
* **[FAQ](/general/faq/)**: environments, authentication, and common questions.
## API environments
[Section titled “API environments”](#api-environments)
| Environment | Base URL |
| ----------- | ---------------------------------- |
| Production | `https://api.btcdirect.eu` |
| Sandbox | `https://api-sandbox.btcdirect.eu` |
Contact your account manager for sandbox access and API credentials.
# CAIP-19 currency identifiers
BTC Direct API v1 and v2 support [CAIP-19](https://github.com/ChainAgnostic/CAIPs/blob/main/CAIPs/caip-19.md): a chain-agnostic standard for uniquely identifying blockchain assets. This allows you to reference currencies by their canonical on-chain identity rather than BTC Direct’s internal currency codes.
This is especially useful when:
* Your application already tracks assets by on-chain identifier
* You need to distinguish multi-network tokens unambiguously (e.g. USDC on Ethereum vs. USDC on Solana)
## CAIP-19 format
[Section titled “CAIP-19 format”](#caip-19-format)
A CAIP-19 identifier follows this structure:
```plaintext
{chain_id}/{asset_namespace}:{asset_reference}
```
Some examples for currencies available on BTC Direct:
| Currency | CAIP-19 identifier |
| ------------- | ------------------------------------------------------------------------------------------ |
| Bitcoin | `bip122:000000000019d6689c085ae165831e93/slip44:0` |
| Ethereum | `eip155:1/slip44:60` |
| Euro | `swift:0/iso4217:EUR` |
| USDC (Solana) | `solana:5eykt4UsFv8P8NJdTREpY1vzqKqZKvdp/spl:EPjFWdd5AufqSSqeM2qN1xzybapC8G4wEGGkZwyTDt1v` |
## CAIP-19 in API responses
[Section titled “CAIP-19 in API responses”](#caip-19-in-api-responses)
All v2 endpoints that return currency information include `sourceCurrency` and `targetCurrency` objects containing the CAIP-19 identifier alongside the code, ticker, and name.
**Currency object**
```json
{
"code": "USDC_SOL",
"ticker": "USDC",
"name": "USD Coin (Solana)",
"caip19": "solana:5eykt4UsFv8P8NJdTREpY1vzqKqZKvdp/spl:EPjFWdd5AufqSSqeM2qN1xzybapC8G4wEGGkZwyTDt1v"
}
```
Endpoints that include CAIP-19 identifiers in their responses:
| Endpoint | Field(s) |
| ------------------------------ | ------------------------------------------------ |
| `GET /api/v2/prices` | `{pair}.sourceCurrency`, `{pair}.targetCurrency` |
| `GET /api/v2/buy/orders/{id}` | `sourceCurrency`, `targetCurrency` |
| `GET /api/v2/sell/orders/{id}` | `sourceCurrency`, `targetCurrency` |
| `GET /api/v2/user/dca-codes` | `targetCurrency` |
| `POST /api/v2/buy/checkout` | `sourceCurrency`, `targetCurrency` (response) |
**Example: prices response**
```json
{
"BTC-EUR": {
"sourceCurrency": {
"code": "BTC",
"ticker": "BTC",
"name": "Bitcoin",
"caip19": "bip122:000000000019d6689c085ae165831e93/slip44:0"
},
"targetCurrency": {
"code": "EUR",
"ticker": "EUR",
"name": "Euro",
"caip19": "swift:0/iso4217:EUR"
},
"buy": 54355.90,
"sell": 52722.66
}
}
```
## Using CAIP-19 in requests
[Section titled “Using CAIP-19 in requests”](#using-caip-19-in-requests)
On quote and order creation endpoints, you can identify currencies using CAIP-19 by providing `sourceCurrency` and `targetCurrency`. When both fields are present, they take precedence over the standard currency parameters ( `currencyPair` in v1, `baseCurrency` / `quoteCurrency` in v2).
The direction of the order determines which currency maps to which field:
| Order type | `sourceCurrency` | `targetCurrency` |
| -------------------------- | ----------------- | ----------------- |
| Buy: fiat to crypto (F2C) | Fiat (e.g. EUR) | Crypto (e.g. BTC) |
| Sell: crypto to fiat (C2F) | Crypto (e.g. BTC) | Fiat (e.g. EUR) |
In short: **source is what the customer sends, target is what they receive.**
### V1: buy quote (F2C)
[Section titled “V1: buy quote (F2C)”](#v1-buy-quote-f2c)
`POST /api/v1/buy/quote`
```json
{
"sourceCurrency": "swift:0/iso4217:EUR",
"targetCurrency": "bip122:000000000019d6689c085ae165831e93/slip44:0",
"paymentMethod": "iDeal",
"fiatAmount": 100
}
```
When `sourceCurrency` and `targetCurrency` are provided, `currencyPair` is derived automatically and any `currencyPair` value in the request is ignored.
### V1: sell quote (C2F)
[Section titled “V1: sell quote (C2F)”](#v1-sell-quote-c2f)
`POST /api/v1/sell/quote`
```json
{
"sourceCurrency": "bip122:000000000019d6689c085ae165831e93/slip44:0",
"targetCurrency": "swift:0/iso4217:EUR",
"cryptoAmount": 0.01
}
```
When `sourceCurrency` and `targetCurrency` are provided, `currencyPair` is derived automatically and any `currencyPair` value in the request is ignored.
### V2: checkout (F2C)
[Section titled “V2: checkout (F2C)”](#v2-checkout-f2c)
`POST /api/v2/buy/checkout`
```json
{
"sourceCurrency": "swift:0/iso4217:EUR",
"targetCurrency": "solana:5eykt4UsFv8P8NJdTREpY1vzqKqZKvdp/spl:EPjFWdd5AufqSSqeM2qN1xzybapC8G4wEGGkZwyTDt1v",
"paymentMethod": "iDeal",
"quoteCurrencyAmount": 100
}
```
When `sourceCurrency` and `targetCurrency` are provided, they take precedence over `baseCurrency` and `quoteCurrency`.
### V2: offer (F2C)
[Section titled “V2: offer (F2C)”](#v2-offer-f2c)
`POST /api/v2/buy/offer`
```json
{
"sourceCurrency": "swift:0/iso4217:EUR",
"targetCurrency": "bip122:000000000019d6689c085ae165831e93/slip44:0",
"paymentMethod": "iDeal",
"quoteCurrencyAmount": 100,
"returnUrl": "https://example.com/return"
}
```
When `sourceCurrency` and `targetCurrency` are provided, they take precedence over `baseCurrency` and `quoteCurrency`.
## Widget support
[Section titled “Widget support”](#widget-support)
CAIP-19 currency identifiers are **not yet supported** in the Widget integration. The Widget currently uses `baseCurrency` and `quoteCurrency` to identify currencies. CAIP-19 support for widgets is planned for a future release.
If you need CAIP-19-based currency resolution today, use the API integration instead.
# Supported currencies
The available currencies depend on your account configuration and the order type.
## Fiat currencies
[Section titled “Fiat currencies”](#fiat-currencies)
Currently supported fiat currency: `EUR`.
All prices, quotes, and orders are denominated in EUR. If your platform supports other fiat currencies (USD, GBP, etc.), you are responsible for converting to/from EUR on your side before calling the BTC Direct API. The API does not perform fiat-to-fiat conversion.
## Cryptocurrency pairs
[Section titled “Cryptocurrency pairs”](#cryptocurrency-pairs)
All currency pairs are quoted against EUR. Use `baseCurrency` for the crypto code and `quoteCurrency: "EUR"` in API requests.
Alternatively, you can use [CAIP-19 identifiers](/general/caip19/) with `sourceCurrency` and `targetCurrency`.
| Code | Name | Chain | Buy | Sell | Supports tag |
| ---------- | ----------------------- | ----------------- | --- | ---- | ------------ |
| `BTC` | Bitcoin | Bitcoin | yes | yes | no |
| `ETH` | Ether | Ethereum | yes | yes | no |
| `LTC` | Litecoin | Litecoin | yes | yes | no |
| `XRP` | Ripple | XRP Ledger | yes | yes | yes |
| `SOL` | Solana | Solana | yes | yes | no |
| `BCH` | Bitcoin Cash | Bitcoin Cash | yes | yes | no |
| `ADA` | Cardano | Cardano | yes | yes | no |
| `DOGE` | Dogecoin | Dogecoin | yes | yes | no |
| `BNB` | Binance Coin | BNB Smart Chain | yes | yes | no |
| `USDC` | USD Coin | Ethereum | yes | yes | no |
| `USDC_SOL` | USDC (Solana) | Solana | yes | yes | no |
| `LINK` | Chainlink | Ethereum | yes | yes | no |
| `UNI` | Uniswap | Ethereum | yes | yes | no |
| `ALGO` | Algorand | Algorand | yes | yes | no |
| `ATOM` | Cosmos | Cosmos Hub | yes | yes | yes |
| `NEAR` | Near Protocol | NEAR | yes | yes | no |
| `XLM` | Stellar | Stellar | yes | yes | yes |
| `TON` | Toncoin | TON | yes | yes | yes |
| `TRX` | TRON | TRON | yes | no | no |
| `AVAX` | Avalanche | Avalanche C-Chain | yes | yes | no |
| `SUI` | SUI | SUI | yes | yes | no |
| `ARB` | Arbitrum | Arbitrum | yes | yes | no |
| `OP` | Optimism | Optimism | yes | yes | no |
| `POL` | Polygon | Polygon | yes | yes | no |
| `DOT` | Polkadot | Polkadot | no | yes | no |
| `PEPE` | Pepe | Ethereum | yes | yes | no |
| `SHIB` | Shiba Inu | Ethereum | yes | yes | no |
| `INJ` | INJ | Injective | yes | no | yes |
| `HBAR` | Hedera | Hedera | yes | no | yes |
| `APT` | Aptos | Aptos | yes | no | no |
| `ENA` | Ethena | Ethereum | yes | yes | no |
| `LDO` | Lido DAO | Ethereum | yes | yes | no |
| `ONDO` | Ondo | Ethereum | yes | yes | no |
| `RENDER` | Render | Solana | yes | yes | no |
| `TRUMP` | Official Trump | Solana | yes | yes | no |
| `BONK` | Bonk | Solana | yes | no | no |
| `AAVE` | AAVE | Ethereum | yes | yes | no |
| `ETC` | Ethereum Classic | Ethereum Classic | yes | yes | no |
| `QNT` | Quant | Ethereum | yes | yes | no |
| `SKY` | SKY | Ethereum | yes | yes | no |
| `CC` | Canton | Ethereum | yes | no | yes |
| `ETH_ARB` | Ethereum (Arb) | Arbitrum | yes | no | no |
| `ETH_BASE` | Ethereum (Base) | Base | yes | no | no |
| `ETH_UNI` | Ethereum (Unichain) | Unichain | yes | no | no |
| `USDC_UNI` | USDC (Unichain) | Unichain | yes | no | no |
| `KAS` | Kaspa | Kaspa | yes | no | no |
| `MNT` | Mantle | Mantle | yes | no | no |
| `FIL` | Filecoin | Filecoin | yes | no | no |
| `SPX` | SPX6900 | Ethereum | yes | no | no |
| `HYPE` | Hyperliquid | Hyperliquid | yes | no | no |
| `MON` | Monad | Monad | yes | no | no |
| `WLD` | Worldcoin | Ethereum | yes | no | no |
| `WLFI` | World Liberty Financial | Ethereum | yes | no | no |
| `ASTER` | Aster | BNB Smart Chain | yes | no | no |
| `SEI` | SEI | SEI | yes | no | no |
Tip
This list may change. Use [`GET /api/v1/system/currency-pairs`](/api/v1/#/System/get_app_v1_system_currencypairs_currencypairs) to retrieve the current list programmatically.
# Frequently asked questions
Below are some frequently asked questions about our API. Please contact your account manager if you need assistance.
## What environments are available?
[Section titled “What environments are available?”](#what-environments-are-available)
| Environment | Base URL |
| ----------- | ---------------------------------- |
| Production | `https://api.btcdirect.eu` |
| Sandbox | `https://api-sandbox.btcdirect.eu` |
Contact your account manager to request access to the sandbox environment.
## Where can I find the OpenAPI specification?
[Section titled “Where can I find the OpenAPI specification?”](#where-can-i-find-the-openapi-specification)
The full OpenAPI (Swagger) specification is available as JSON:
| Version | Production | Sandbox |
| ------- | ---------------------------------------------------------------------------- | -------------------------------------------------------------------------------------------- |
| V1 | [api.btcdirect.eu/api/v1/doc.json](https://api.btcdirect.eu/api/v1/doc.json) | [api-sandbox.btcdirect.eu/api/v1/doc.json](https://api-sandbox.btcdirect.eu/api/v1/doc.json) |
| V2 | [api.btcdirect.eu/api/v2/doc.json](https://api.btcdirect.eu/api/v2/doc.json) | [api-sandbox.btcdirect.eu/api/v2/doc.json](https://api-sandbox.btcdirect.eu/api/v2/doc.json) |
You can also browse the specification interactively via the [V1](/api/v1/) and [V2](/api/v2/) pages.
## How do I authenticate with the API?
[Section titled “How do I authenticate with the API?”](#how-do-i-authenticate-with-the-api)
Obtain a JWT token by calling the `/api/v1/authenticate` endpoint. For more information, refer to the [client authentication](/api/client-authentication/) page.
## Do you offer SDKs for different programming languages?
[Section titled “Do you offer SDKs for different programming languages?”](#do-you-offer-sdks-for-different-programming-languages)
Not yet. We are working towards adding this in the future. Please contact your account manager and let us know your specific wishes so we can prioritize accordingly.
However, we do offer an OpenAPI specification that you can use to generate clients in your preferred language. See the links above.
## Do you have a sandbox environment?
[Section titled “Do you have a sandbox environment?”](#do-you-have-a-sandbox-environment)
Yes, the sandbox environment is available at `https://api-sandbox.btcdirect.eu`. Contact your account manager to request access.
# Payment methods
Payment methods determine how your user pays for their order. The available methods depend on your account configuration, the user’s country, and the order type (buy or sell).
## Retrieving available payment methods
[Section titled “Retrieving available payment methods”](#retrieving-available-payment-methods)
Call the payment methods endpoint to get the list of methods available for your account.
### Buy (fiat-to-coin)
[Section titled “Buy (fiat-to-coin)”](#buy-fiat-to-coin)
[`GET /api/v1/buy/payment-methods/{type}`](/api/v1/operations/get_app_v1_buy_paymentmethods_paymentmethods/): returns the list of payment methods available for buying cryptocurrency. Pass `all` or `preferred` as type. Requires a partner JWT token. See [Retrieving payment methods](/unified-checkout/retrieving-payment-methods/) for usage details.
### Sell (coin-to-fiat)
[Section titled “Sell (coin-to-fiat)”](#sell-coin-to-fiat)
`GET /api/v1/sell/payment-methods`: returns the list of payment methods available for selling cryptocurrency. Requires a partner JWT token.
## Payment method codes
[Section titled “Payment method codes”](#payment-method-codes)
Payment method codes are **case-sensitive**. Always use the exact code as returned by the payment methods endpoint.
| Code | Name | Buy (F2C) | Sell (C2F) |
| -------------- | ------------------------------ | --------- | ---------- |
| `bancontact` | Bancontact | yes | |
| `bankTransfer` | Bank transfer (SEPA) | yes | yes |
| `creditCard` | Credit card (Visa, Mastercard) | yes | expected |
| `eps` | EPS | yes | |
| `giropay` | Giropay | yes | |
| `iDeal` | iDEAL | yes | |
| `sofort` | Sofort | yes | |
| `applepay` | Apple Pay | yes | |
| `googlepay` | Google Pay | yes | |
| `paypal` | PayPal | yes | expected |
Tip
Not all payment methods are available for every partner or country. Always call the payment methods endpoint to get the current list for your account.
## Payment method properties
[Section titled “Payment method properties”](#payment-method-properties)
Each payment method returned by the endpoint includes:
* **`code`**: The code to use in checkout and offer requests.
* **`label`**: A display name for the payment method.
* **`limit`**: The maximum order amount for this method.
* **`expirationPeriod`**: How long (in seconds) the user has to complete payment.
* **`fees`**: Fee structure for this method.
# Wallet addresses
When creating a checkout or offer, you provide a `walletAddress` where the purchased cryptocurrency will be sent.
## Is walletAddress required?
[Section titled “Is walletAddress required?”](#is-walletaddress-required)
Yes, `walletAddress` is required. Omitting it will result in error `ER325`. Some partners have a custom configuration where wallet address handling works differently. This is configured by BTC Direct and your account manager will inform you if this applies to your integration.
## Address validation
[Section titled “Address validation”](#address-validation)
Each cryptocurrency has its own address format. The API validates the address against the selected `baseCurrency`. Invalid addresses will result in error `ER014`.
The validation uses **mainnet addresses** in all environments, including the sandbox. Do not use testnet addresses.
## Supported currencies
[Section titled “Supported currencies”](#supported-currencies)
The list of supported currencies and their chains can be retrieved from the API. The `chain` field in the response determines the expected wallet address format.
Common address formats:
| Chain | Format | Example prefix |
| ----------------------------- | ------------------------------- | --------------------- |
| Bitcoin | P2PKH, P2SH, Bech32, Bech32m | `1`, `3`, `bc1` |
| Ethereum and EVM chains | EIP-55 checksummed, 0x-prefixed | `0x` |
| Solana | Base58 | varies |
| XRP Ledger | Classic address | `r` |
| Cosmos-based (ATOM, INJ, SEI) | Bech32 | chain-specific prefix |
| Stellar | Ed25519 public key | `G` |
| Cardano | Shelley/Byron | `addr1` |
| Algorand | Base32 | varies |
| TON | Raw or user-friendly | varies |
| Polkadot | SS58 | `1` |
| Kaspa | Bech32-like | `kaspa:` |
Tip
Tokens on EVM chains (like USDC on Ethereum, ARB on Arbitrum, OP on Optimism) use the same address format as the parent chain. An Ethereum address works for all ERC-20 tokens.
## Wallet address tags
[Section titled “Wallet address tags”](#wallet-address-tags)
Some cryptocurrencies require an additional `walletAddressTag` (destination tag or memo). Check the `supportsTag` field in the currency-pairs response to determine if a tag is needed. Currencies that support tags include XRP, XLM, ATOM, INJ, TON, HBAR, and CC.
## Related
[Section titled “Related”](#related)
* [Supported currencies](/general/currencies/)
* [Unified Checkout](/unified-checkout/)
# Webhooks
BTC Direct can send webhook notifications to your server when events occur on orders and users. This allows your application to react to changes in real-time without polling the API.
To set up webhooks for your account, contact your account manager.
## How it works
[Section titled “How it works”](#how-it-works)
When an event occurs, BTC Direct sends an HTTP POST request to your configured webhook URL. The payload contains the event type and relevant data.
All webhooks include a SHA-256 HMAC signature for verification, generated using your partner secret.
## Order lifecycle
[Section titled “Order lifecycle”](#order-lifecycle)
A typical buy (fiat-to-coin) order goes through the following stages. The webhooks you receive depend on how far the order progresses:
```
flowchart TD
order_created -->|payment received| order_paid
order_created -->|expired or cancelled| order_payment_failed
order_payment_failed --> order_cancelled
order_paid --> order_sent
order_paid -->|delivery fails| order_payment_delivery_failed
order_sent --> order_completed
```
## Order events
[Section titled “Order events”](#order-events)
| Event | Description |
| ------------------------------- | ---------------------------------------------------------------------------------------------- |
| `order_created` | A new order has been created. |
| `order_paid` | Payment for the order has been received. |
| `order_completed` | The order is fully completed. Crypto has been delivered (F2C) or fiat has been paid out (C2F). |
| `order_sent` | Payment or crypto has been sent to the user. |
| `order_cancelled` | The order has been cancelled. |
| `order_payment_failed` | The payment attempt failed (expired or cancelled by user). |
| `order_deposit_detected` | A deposit has been detected on the blockchain (C2F orders). |
| `order_deposit_confirmed` | A deposit has been confirmed on the blockchain (C2F orders). |
| `order_payment_delivery_failed` | Delivery of the payment failed. |
| `order_payment_chargeback` | A chargeback has been initiated on the payment. |
## User lifecycle
[Section titled “User lifecycle”](#user-lifecycle)
```
flowchart TD
user_created --> user_verified
user_created -->|identifier linked| user_identifier_linked
user_verified --> user_logged_in
user_logged_in -->|identifier linked| user_identifier_linked
user_verified -->|account disabled| user_disabled
```
## User events
[Section titled “User events”](#user-events)
| Event | Description |
| ------------------------ | ----------------------------------------------------------------------------------------------------------------------------------------------------------------------------------------------------------------------------------------------- |
| `user_created` | A new user account has been created. |
| `user_identifier_linked` | A partner-supplied identifier has been linked to a user account. Sent only when linking succeeds, and echoes back your original (raw) identifier. Used in the [encrypted user-identifier checkout flow](/unified-checkout/linking-your-users/). |
| `user_verified` | The user has completed identity verification (KYC). |
| `user_disabled` | The user account has been disabled. |
| `user_logged_in` | The user has logged in. |
## Signature verification
[Section titled “Signature verification”](#signature-verification)
Each webhook request includes a signature header. Verify it by computing the SHA-256 HMAC of the request body using your partner secret and comparing it to the signature in the header.
# Unified Checkout
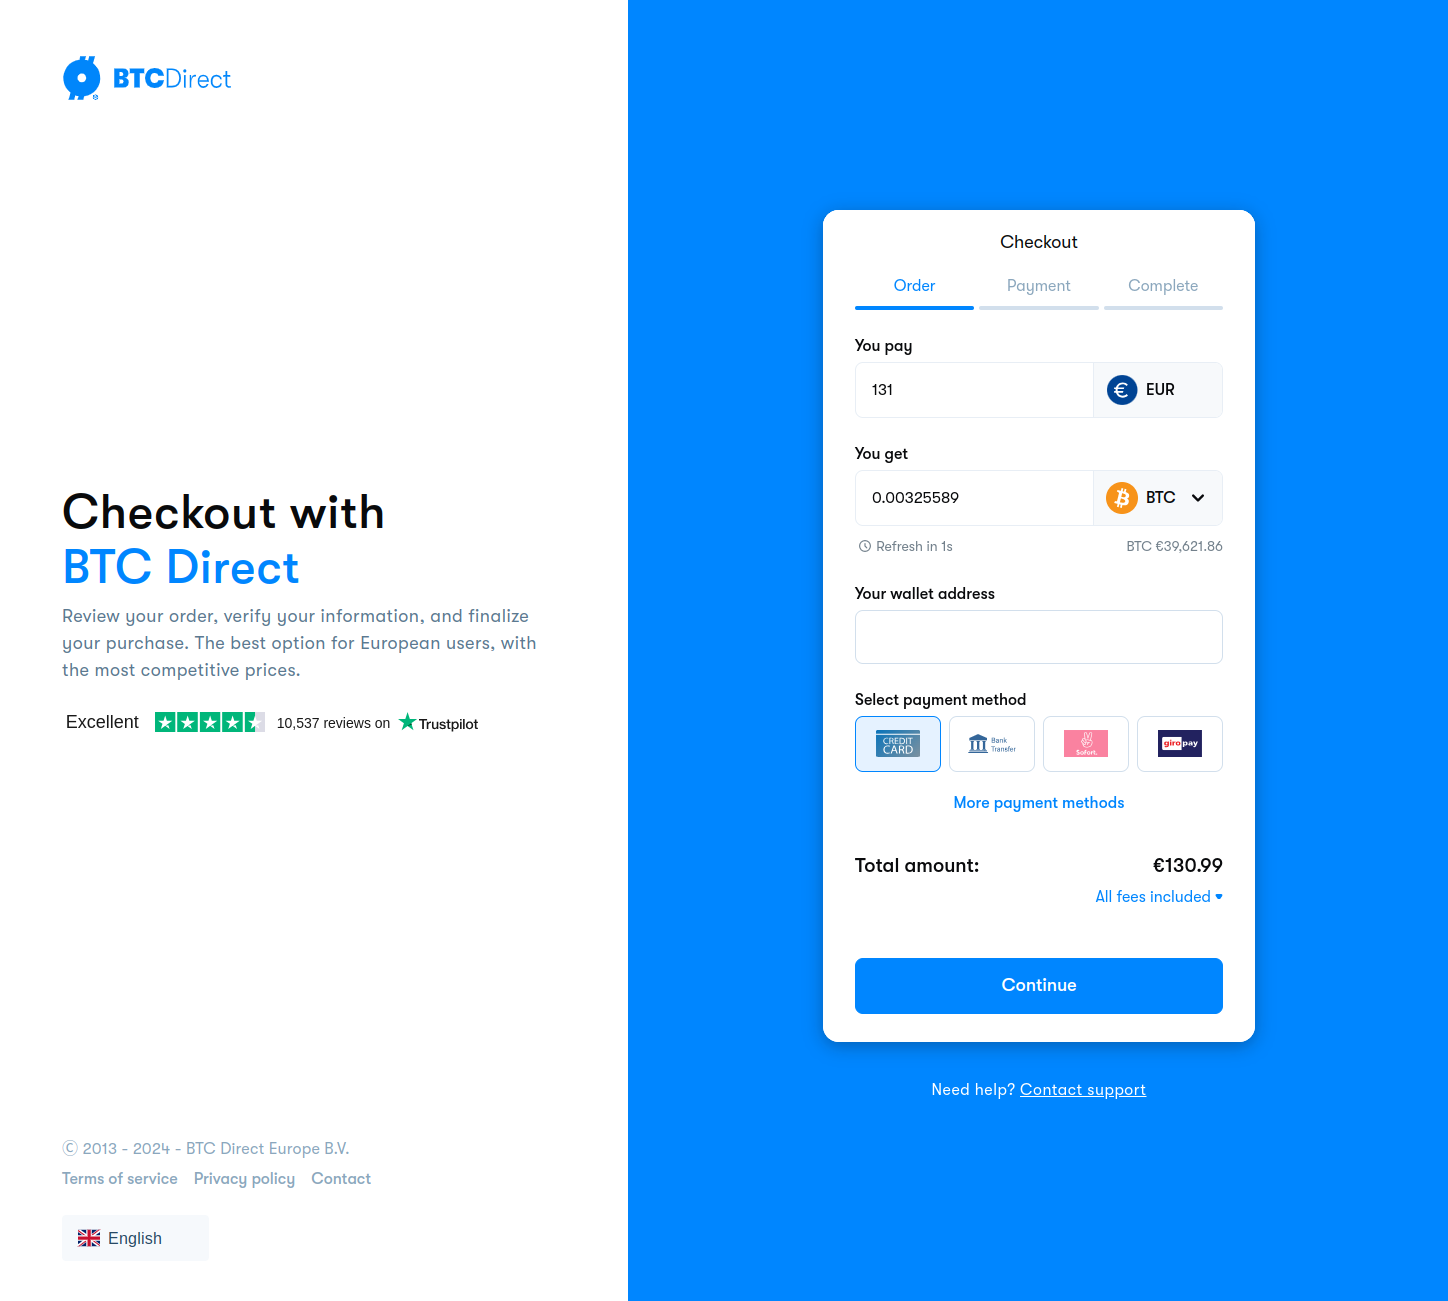
The Unified Checkout is the fastest way to integrate BTC Direct into your platform. Your users are redirected to a hosted checkout page where they can complete their cryptocurrency purchase. No need to build your own order flow.
## How it works
[Section titled “How it works”](#how-it-works)
1. Your backend authenticates with the BTC Direct API using your partner credentials.
2. You create a checkout session by calling the checkout endpoint with the order details.
3. The API returns a `checkoutUrl`.
4. You redirect the user to that URL.
5. The user completes payment on the BTC Direct hosted checkout page.
6. After payment, the user is redirected back to your `returnUrl`.
## What you need
[Section titled “What you need”](#what-you-need)
* **API credentials** (username and password) from your account manager.
* A **backend service** to authenticate and create checkout sessions. Never expose your credentials in frontend code.
* A **wallet address** for the cryptocurrency the user is buying.
## Supported flows
[Section titled “Supported flows”](#supported-flows)
The Unified Checkout currently supports the **buy (fiat-to-coin)** flow. The user pays with fiat and receives cryptocurrency.
For available payment methods, see [Payment methods](/general/payment-methods/). For supported currencies, see [Supported currencies](/general/currencies/).
## Sandbox
[Section titled “Sandbox”](#sandbox)
The sandbox environment (`api-sandbox.btcdirect.eu`) simulates the production flow but does not process real payments. Orders are created and checkout URLs are generated, but no actual transactions occur. Wallet addresses must use mainnet format even in sandbox.
## Limitations
[Section titled “Limitations”](#limitations)
* iFrames are not supported. The user must be redirected to the checkout URL.
* The checkout URL is single-use and expires based on the payment method’s expiration period.
## Next steps
[Section titled “Next steps”](#next-steps)
Follow the [Quick start: buy (F2C)](/unified-checkout/quick-start-buy/) guide to create your first checkout session.
# Setting a quote expiry
By default, checkout sessions use BTC Direct’s standard quote validity window. The `expireTime` parameter lets you shorten that window if you want the user to act faster.
## Setting the expiry
[Section titled “Setting the expiry”](#setting-the-expiry)
Pass `expireTime` as the number of seconds the quote should remain valid:
```json
{
"baseCurrency": "BTC",
"quoteCurrency": "EUR",
"paymentMethod": "creditCard",
"quoteCurrencyAmount": 50,
"walletAddress": "bc1...",
"expireTime": "300"
}
```
In this example, the user has 300 seconds (5 minutes) to complete the checkout before the quote expires.
## What happens on expiry
[Section titled “What happens on expiry”](#what-happens-on-expiry)
If the user does not complete the checkout within the expiry window, the checkout URL becomes invalid. The user sees an expiry message on the BTC Direct checkout page.
To start a new checkout, your integration must create a new checkout session.
# Linking your users to BTC Direct accounts
Pass an optional `identifier` on the checkout call to link the user in your system to their BTC Direct account. Once linked, returning users skip the BTC Direct sign-in screen on every following checkout, and orders, callbacks, and user-level API calls trace back to the same person on your side.
## What you get
[Section titled “What you get”](#what-you-get)
* **No re-login.** Returning users skip the BTC Direct sign-in screen on every checkout. They go from your app straight to the payment step.
* **Traceability.** Orders, status callbacks, and follow-up API calls map cleanly back to the same person in your system.
* **One-step setup.** No separate [`register-identifier`](/api/v1/operations/post_app_v1_user_registeridentifier_registeruseridentifier/) call needed; pass the identifier on the checkout request you’re already making.
## When to use this
[Section titled “When to use this”](#when-to-use-this)
Pass an `identifier` whenever you can recognise the same person across visits. The recogniser does not have to be a user account in the traditional sense. Anything stable per user works.
| Example | What you pass as `identifier` |
| ------------------------------------------------------------------------- | ------------------------------------------------------------------------------------------------------------------------------------------------------------------------------------------------------------------- |
| **Platforms with user accounts** (exchanges, custodial services, brokers) | Your user UUID, account ID, or opaque user reference from your auth system. |
| **Hardware wallet apps** | A hash of the user’s XPUB, device serial, or wallet UUID. You may have no name and no email on your side, and that’s fine: BTC Direct collects the user details on signup, you only need to provide the recogniser. |
| **Self-custodial wallets and dapps** | A wallet address, public key, or session-bound wallet identifier. The user owns the wallet across visits, so the identifier stays stable. |
| **Repeat customers** | Whatever identifier you already have. The user buys BTC today, ETH next month, sells ETH next year, and every checkout opens straight to their BTC Direct account with no sign-in. |
| **Affiliate or loyalty tracking** | A user or wallet reference. You can tie purchase volume to a specific person without joining on email or name. |
| **Customer support and reporting** | The same record key you already use. Support agents and dashboards see BTC Direct orders mapped to the user record they already know. |
The point: the identifier is your side’s **recogniser**, not the user’s identity. BTC Direct still collects email and KYC on signup; you don’t need to know any of that.
If your product genuinely can’t recognise the same person across visits (a pure embedded widget on an anonymous landing page, for example), omit the field. Users sign in or sign up on the BTC Direct page as before and the checkout still works.
## How it works
[Section titled “How it works”](#how-it-works)
1. **Pick an identifier per user.** 36 to 255 characters, stable for the lifetime of the user (a UUID, hashed wallet key, or opaque user reference) and unique per user. It doubles as an authentication credential, so prefer an opaque reference and keep PII out of it (see [Common pitfalls](#common-pitfalls)).
2. **Pass it as `identifier`** on [`POST /api/v2/buy/checkout`](/api/v2/operations/post_app_v2_buy_checkout_checkout/), in the request body. This is the only place you supply the raw value.
3. **BTC Direct encrypts it into the returned `checkoutUrl`.** Redirect the customer to that URL exactly as returned — never build the checkout URL yourself or put a raw identifier in it. Only the encrypted token travels in the browser (URL, headers, storage); the raw value stays server-side.
4. **On the checkout page:**
* **First-time user:** they sign up on the checkout page. The identifier is linked to their new BTC Direct account during signup.
* **Returning user:** the identifier is already linked, so the sign-in screen is skipped and they continue straight to checkout.
5. **BTC Direct calls the [`user_identifier_linked`](/general/webhooks/) webhook** once the link succeeds, echoing your original (raw) identifier. We strongly recommend consuming it — see [When the identifier becomes usable](#when-the-identifier-becomes-usable).
6. **For any later direct API call on behalf of that user,** authenticate them with the same identifier in the `User-Identifier` header. See [User authentication, Option 2](/api/user-authentication/#option-2-user-identifier).
```
sequenceDiagram
participant P as Your backend
participant API as BTC Direct
participant B as Customer browser
participant H as Your webhook endpoint
P->>API: POST /api/v2/buy/checkout (identifier: raw, in body)
API-->>P: checkoutUrl (identifier encrypted inside)
P->>B: redirect to checkoutUrl
B->>API: open checkout (encrypted token only)
Note over B,API: first-time user signs up & consents → linked returning user: already linked → sign-in skipped
API->>H: user_identifier_linked webhook (raw identifier)
Note over P,H: from here the identifier authenticates the user
P->>API: later calls — User-Identifier: raw identifier
```
Tip
You only ever handle the **raw** identifier server-side: you send it in the checkout request body and receive it back on the webhook. In the browser it is always the encrypted token. So pass it on the checkout call and use the `checkoutUrl` as-is — don’t reconstruct the URL or inject a raw identifier into it.
## Example
[Section titled “Example”](#example)
```bash
curl -X POST https://api-sandbox.btcdirect.eu/api/v2/buy/checkout \
-H "Content-Type: application/json" \
-H "Authorization: Bearer YOUR_TOKEN" \
-d '{
"baseCurrency": "BTC",
"quoteCurrency": "EUR",
"paymentMethod": "creditCard",
"quoteCurrencyAmount": 50,
"walletAddress": "bc1...",
"identifier": "partner-unique-user-id-at-least-36-characters-long"
}'
```
Try it out
Create a checkout session linked to a partner-supplied user identifier.
Base URL Sandbox (api-sandbox.btcdirect.eu) (https\://api-sandbox.btcdirect.eu) Authorization (partner JWT token) Bearer eyJ... Request body {
"baseCurrency": "BTC",
"quoteCurrency": "EUR",
"paymentMethod": "creditCard",
"quoteCurrencyAmount": 50,
"walletAddress": "bc1...",
"identifier": "partner-unique-user-id-at-least-36-characters-long"
}
POST /api/v2/buy/checkout Copy as curl
Response
```
```
## Constraints
[Section titled “Constraints”](#constraints)
| Rule | Detail |
| ------------ | -------------------------------------------------------------------------------------------------------------------------------- |
| Length | 36 to 255 characters. Shorter values return `ER102`. |
| Type | String. Other types return `ER053`. |
| Empty string | Treated as invalid (returns `ER053` / `ER102`). Omit the field if you have no identifier for this user. |
| Stability | Must be stable for the lifetime of the user. Changing it for the same person creates a new, unlinked BTC Direct account. |
| Uniqueness | Must be unique per user. Reusing the same identifier across different users would point them all at the same BTC Direct account. |
## After checkout: calling user endpoints
[Section titled “After checkout: calling user endpoints”](#after-checkout-calling-user-endpoints)
### When the identifier becomes usable
[Section titled “When the identifier becomes usable”](#when-the-identifier-becomes-usable)
The identifier only authenticates a user **after** it has been linked — which happens when the customer signs up or consents during checkout, not when you send it on the checkout call. Subscribe to the [`user_identifier_linked`](/general/webhooks/) webhook to know when that happens:
* **Before the webhook:** the link may not exist yet (the customer may not have finished checkout). Keep routing the customer through the `checkoutUrl`; don’t rely on the `User-Identifier` header yet.
* **After the webhook:** the identifier is linked. You can authenticate the user directly with the `User-Identifier` header on user-level endpoints.
Note
**Success only.** BTC Direct sends `user_identifier_linked` **only when linking succeeds** — never to report a failure. A link can stay incomplete for many reasons (the customer abandons checkout, doesn’t finish sign-up, or doesn’t pass verification), so there is deliberately no “link failed” event. Treat the absence of the webhook as “not linked yet” — not as a failure — and keep routing the customer through the `checkoutUrl`.
Once the identifier is linked, you can call user-level endpoints (order history, user info, payment accounts) by sending the identifier as a header. The full pattern is documented under [User authentication, Option 2](/api/user-authentication/#option-2-user-identifier); the short version is:
```plaintext
Authorization: Bearer {partner_token}
User-Identifier: {identifier}
```
No separate user-login token round-trip needed.
## Common pitfalls
[Section titled “Common pitfalls”](#common-pitfalls)
Caution
**Don’t regenerate identifiers per checkout.** A fresh identifier per checkout creates a fresh BTC Direct account each time and defeats the auto-login. Persist one identifier per user on your side and reuse it forever.
Caution
**Prefer an opaque reference over PII (emails, names, IBANs).** The identifier is encrypted in the checkout URL and hashed at rest, but it doubles as an authentication credential and is echoed back to you on the `user_identifier_linked` webhook — so treat it like one. Hash it or use an opaque reference.
Note
The identifier is **not** part of the signed checkout fields. The cryptographic `signature` protects the financial parameters (amount, currencies, wallet address); the identifier is the partner-side user link and is intentionally outside that scope.
## Migrating from `register-identifier`
[Section titled “Migrating from register-identifier”](#migrating-from-register-identifier)
If your integration today calls [`POST /api/v1/user/register-identifier`](/api/v1/operations/post_app_v1_user_registeridentifier_registeruseridentifier/) before redirecting the user to checkout, you can drop that call and pass the same identifier directly on `POST /api/v2/buy/checkout`. Behaviour for new and returning users is identical; the only difference is one fewer round-trip.
The legacy `register-identifier` endpoint stays available and continues to work for non-checkout flows.
# Locking checkout fields
By default, users can change the amount, currency, and payment method on the checkout page. You can lock any of these fields to prevent changes, giving you more control over the order flow.
## fixedAmount
[Section titled “fixedAmount”](#fixedamount)
When set to `true`, the user cannot change the order amount on the checkout page. The amount you specified (`quoteCurrencyAmount` or `baseCurrencyAmount`) is locked.
**When to use:** you have already shown the user a price in your UI (e.g. from a [quote](/unified-checkout/requesting-a-quote/)) and want to ensure they pay exactly that amount.
```json
{
"quoteCurrencyAmount": 50,
"fixedAmount": true
}
```
## fixedCurrency
[Section titled “fixedCurrency”](#fixedcurrency)
When set to `true`, the user cannot change the cryptocurrency on the checkout page. The `baseCurrency` you specified is locked.
**When to use:** your platform only supports specific currencies, or the user has already selected a currency in your UI and switching would invalidate other data (e.g. the wallet address).
```json
{
"baseCurrency": "BTC",
"fixedCurrency": true
}
```
## fixedPaymentMethod
[Section titled “fixedPaymentMethod”](#fixedpaymentmethod)
When set to `true`, the user cannot change the payment method on the checkout page. The `paymentMethod` you specified is locked.
**When to use:** you have already determined the best payment method for the user (e.g. based on their [country](/unified-checkout/retrieving-payment-methods/)) and want to streamline the checkout experience.
```json
{
"paymentMethod": "iDeal",
"fixedPaymentMethod": true
}
```
## Combining locked fields
[Section titled “Combining locked fields”](#combining-locked-fields)
You can lock multiple fields at once. For example, to create a fully pre-configured checkout where the user only needs to confirm:
```json
{
"baseCurrency": "BTC",
"quoteCurrency": "EUR",
"paymentMethod": "iDeal",
"quoteCurrencyAmount": 50,
"walletAddress": "bc1...",
"fixedAmount": true,
"fixedCurrency": true,
"fixedPaymentMethod": true
}
```
This is useful when you have already collected all preferences in your own UI and want the BTC Direct checkout to act as a confirmation step only.
# Linking orders to your system
The `partnerOrderIdentifier` field lets you attach your own reference to a checkout session. BTC Direct stores this value on the order and includes it in order status updates.
## Setting the identifier
[Section titled “Setting the identifier”](#setting-the-identifier)
Pass any string that identifies the order in your system:
```json
{
"baseCurrency": "BTC",
"quoteCurrency": "EUR",
"paymentMethod": "creditCard",
"quoteCurrencyAmount": 50,
"walletAddress": "bc1...",
"partnerOrderIdentifier": "my-order-123"
}
```
The value is stored as-is. BTC Direct does not validate or interpret it.
## Retrieving it later
[Section titled “Retrieving it later”](#retrieving-it-later)
The `partnerOrderIdentifier` is returned in the order detail response from the [Reporting API](/api/v2/operations/get_app_v2_order_details/) and included in order status callbacks. Use it to look up the corresponding record in your own database without needing to store the BTC Direct order ID.
## Tip: combining with returnUrl
[Section titled “Tip: combining with returnUrl”](#tip-combining-with-returnurl)
To track which order a redirect belongs to after checkout, encode the identifier in your `returnUrl`:
```json
{
"returnUrl": "https://yourapp.com/order/complete?ref=my-order-123",
"partnerOrderIdentifier": "my-order-123"
}
```
# Quick start: buy (F2C)
This guide walks you through creating your first fiat-to-coin checkout session. By the end, you will have a working checkout URL that redirects users to the BTC Direct payment page.
## Prerequisites
[Section titled “Prerequisites”](#prerequisites)
* API credentials (username and password) from your account manager.
* A backend environment where you can make HTTP requests (Node.js, PHP, Python, etc.).
* A valid cryptocurrency wallet address for the selected coin.
## Step 1: Authenticate
[Section titled “Step 1: Authenticate”](#step-1-authenticate)
Call the [`POST /api/v1/authenticate`](/api/v1/operations/post_app_v1_authentication_authenticate_authenticate/) endpoint with your partner credentials to get a JWT token.
```bash
curl -X POST https://api-sandbox.btcdirect.eu/api/v1/authenticate \
-H "Content-Type: application/json" \
-d '{"username": "YOUR_USERNAME", "password": "YOUR_PASSWORD"}'
```
Response:
```json
{
"token": "eyJ...",
"refreshToken": "abc123..."
}
```
The token is valid for 1 hour. Use [`POST /api/v1/refresh`](/api/v1/operations/post_app_v1_authentication_refreshtoken_refresh/) to get a new token before it expires.
Try it out
Authenticate with your partner credentials to get a JWT token.
Base URL Sandbox (api-sandbox.btcdirect.eu) (https\://api-sandbox.btcdirect.eu) Request body {
"username": "YOUR\_USERNAME",
"password": "YOUR\_PASSWORD"
}
POST /api/v1/authenticate Copy as curl
Response
```
```
Caution
Always authenticate from your backend. Never expose your credentials in frontend code.
## Step 2: Create a checkout session
[Section titled “Step 2: Create a checkout session”](#step-2-create-a-checkout-session)
Call the [`POST /api/v2/buy/checkout`](/api/v2/operations/post_app_v2_buy_checkout_checkout/) endpoint with your JWT token and the order details.
```bash
curl -X POST https://api-sandbox.btcdirect.eu/api/v2/buy/checkout \
-H "Content-Type: application/json" \
-H "Authorization: Bearer YOUR_TOKEN" \
-d '{
"baseCurrency": "BTC",
"quoteCurrency": "EUR",
"paymentMethod": "creditCard",
"quoteCurrencyAmount": 50,
"walletAddress": "bc1...",
"returnUrl": "https://example.com/return"
}'
```
Response:
```json
{
"checkoutUrl": "https://checkout.btcdirect.eu?...",
"signature": "abc123...",
"partner": "your-partner-slug",
"baseCurrency": "BTC",
"quoteCurrency": "EUR",
"paymentMethod": "creditCard",
"quoteCurrencyAmount": 50
}
```
Try it out
Create a checkout session. Replace the token and wallet address with your own values.
Base URL Sandbox (api-sandbox.btcdirect.eu) (https\://api-sandbox.btcdirect.eu) Authorization (partner JWT token) Bearer eyJ... Request body {
"baseCurrency": "BTC",
"quoteCurrency": "EUR",
"paymentMethod": "creditCard",
"quoteCurrencyAmount": 50,
"walletAddress": "bc1...",
"returnUrl": "https\://example.com/return"
}
POST /api/v2/buy/checkout Copy as curl
Response
```
```
### Required fields
[Section titled “Required fields”](#required-fields)
| Field | Description |
| --------------------------------------------- | ------------------------------------------------------------------------------------------------------------------------------------------------------------------- |
| `baseCurrency` | The cryptocurrency code (e.g. `BTC`, `ETH`). See [supported currencies](/general/currencies/). |
| `quoteCurrency` | The fiat currency code. Currently only `EUR`. |
| `paymentMethod` | Case-sensitive payment method code. See [payment methods](/general/payment-methods/). |
| `quoteCurrencyAmount` or `baseCurrencyAmount` | The order amount. Use one or the other, not both. |
| `walletAddress` | The destination wallet address. Required. Must be a **mainnet** address in all environments, including sandbox. See [wallet addresses](/general/wallet-addresses/). |
Note
The OpenAPI specification also accepts `sourceCurrency` and `targetCurrency` (CAIP-19 identifiers) as an alternative to `baseCurrency` and `quoteCurrency`. Use one pair or the other, not both. For most integrations, `baseCurrency`/`quoteCurrency` is the simplest option. See [CAIP-19 support](/general/caip19/) for details.
### Optional fields
[Section titled “Optional fields”](#optional-fields)
The checkout endpoint accepts several optional fields for common integration scenarios:
* Need to redirect users back to your app after checkout? See [`returnUrl`](/unified-checkout/return-url/).
* Want to link checkout sessions to records in your own system? See [`partnerOrderIdentifier`](/unified-checkout/partner-order-identifier/).
* Can your product recognise the same person across visits (by user account, wallet, device, or any stable per-user reference)? See [Linking your users to BTC Direct accounts](/unified-checkout/linking-your-users/) so returning users skip the sign-in step on every checkout.
* Need users to act on a quote within a tighter window than the default? See [`expireTime`](/unified-checkout/expire-time/).
* Already showed the quote in your own UI and want to skip the confirmation screen? See [`attemptDirectConfirm`](/unified-checkout/skip-quote-step/).
For the full list, see the [checkout endpoint specification](/api/v2/operations/post_app_v2_buy_checkout_checkout/). To receive order status updates, set up [webhooks](/general/webhooks/).
## Step 3: Redirect the user
[Section titled “Step 3: Redirect the user”](#step-3-redirect-the-user)
Redirect your user to the `checkoutUrl` from the response. The BTC Direct hosted checkout page handles the rest: payment processing, user verification, and order completion.
After the user completes (or cancels) payment, they are redirected back to your `returnUrl`.
The checkout URL is valid for the duration of the selected payment method’s expiration period. After that, the URL expires and a new checkout session must be created.
## Response fields
[Section titled “Response fields”](#response-fields)
| Field | Description |
| ------------- | ----------------------------------------------------------------------------------------------------------------------------------------------------------------------------------------------------------------------------------------- |
| `checkoutUrl` | The URL to redirect your user to. |
| `signature` | A server-generated HMAC signature that protects the checkout URL against tampering (e.g. modified wallet address or amount). Generated automatically by the server. If the signature does not match on our end, the checkout is rejected. |
| `partner` | Your partner identifier, derived from your authenticated session. |
Tip
Your API key is embedded in the checkout URL automatically by the server. You do not need to pass it as a request parameter.
## Code examples
[Section titled “Code examples”](#code-examples)
### PHP
[Section titled “PHP”](#php)
```php
'USERNAME', 'password' => 'PASSWORD']);
$authOptions = [
'http' => [
'header' => "Content-type: application/json\r\n",
'method' => 'POST',
'content' => $authData,
],
];
$authResponse = json_decode(file_get_contents($authEndpoint, false, stream_context_create($authOptions)), true);
$token = $authResponse['token'];
// Step 2: Create checkout
$checkoutData = json_encode([
'baseCurrency' => 'BTC',
'quoteCurrency' => 'EUR',
'paymentMethod' => 'creditCard',
'quoteCurrencyAmount' => 50,
'walletAddress' => 'bc1...',
'returnUrl' => 'https://example.com/return',
]);
$checkoutOptions = [
'http' => [
'header' => "Content-type: application/json\r\nAuthorization: Bearer $token\r\n",
'method' => 'POST',
'content' => $checkoutData,
],
];
$checkoutResponse = json_decode(file_get_contents($checkoutEndpoint, false, stream_context_create($checkoutOptions)), true);
// Step 3: Redirect
header('Location: ' . $checkoutResponse['checkoutUrl']);
```
### Node.js
[Section titled “Node.js”](#nodejs)
```js
const AUTH_ENDPOINT = 'https://api-sandbox.btcdirect.eu/api/v1/authenticate';
const CHECKOUT_ENDPOINT = 'https://api-sandbox.btcdirect.eu/api/v2/buy/checkout';
// Step 1: Authenticate
const authResponse = await fetch(AUTH_ENDPOINT, {
method: 'POST',
headers: { 'Content-Type': 'application/json' },
body: JSON.stringify({ username: 'USERNAME', password: 'PASSWORD' }),
});
const { token } = await authResponse.json();
// Step 2: Create checkout
const checkoutResponse = await fetch(CHECKOUT_ENDPOINT, {
method: 'POST',
headers: {
'Content-Type': 'application/json',
'Authorization': `Bearer ${token}`,
},
body: JSON.stringify({
baseCurrency: 'BTC',
quoteCurrency: 'EUR',
paymentMethod: 'creditCard',
quoteCurrencyAmount: 50,
walletAddress: 'bc1...',
returnUrl: 'https://example.com/return',
}),
});
const { checkoutUrl } = await checkoutResponse.json();
// Step 3: Redirect
res.redirect(checkoutUrl);
```
# Requesting a quote
Before redirecting your user to the checkout, you can request a quote to show pricing information in your own UI. This is useful if you want to display the exchange rate, fees, or total cost before the user leaves your platform.
## Prerequisites
[Section titled “Prerequisites”](#prerequisites)
Before requesting a quote, you need:
1. A valid JWT token. See [Quick start: step 1](/unified-checkout/quick-start-buy/#step-1-authenticate) for how to authenticate.
2. The payment method the user wants to use. See [Retrieving payment methods](/unified-checkout/retrieving-payment-methods/) to get available methods.
3. The currency pair. See [Retrieving supported currencies](/unified-checkout/retrieving-currencies/) to get available pairs.
## How it works
[Section titled “How it works”](#how-it-works)
1. Your backend calls the quote endpoint with the currency pair, amount, and payment method.
2. The API returns a quoted price including fees, exchange rate, and an expiry time.
3. You display this information to the user in your UI.
4. If the user accepts, you create a checkout session using the [quick start flow](/unified-checkout/quick-start-buy/).
## Endpoint
[Section titled “Endpoint”](#endpoint)
[`POST /api/v1/buy/quote`](/api/v1/operations/post_app_v1_buy_quote_quote/)
## Required fields
[Section titled “Required fields”](#required-fields)
| Field | Description |
| --------------- | ------------------------------------------------------------------------------------------------------------------------------------------------------- |
| `currencyPair` | The currency pair (e.g. `BTC-EUR`). Use the value from the [currency pairs endpoint](/unified-checkout/retrieving-currencies/). |
| `paymentMethod` | The payment method code (e.g. `iDeal`, `creditCard`). Use the value from the [payment methods endpoint](/unified-checkout/retrieving-payment-methods/). |
You must also provide one of:
| Field | Description |
| -------------- | ------------------------------------------- |
| `fiatAmount` | The amount in fiat the user wants to spend. |
| `cryptoAmount` | The amount of crypto the user wants to buy. |
## Example
[Section titled “Example”](#example)
```bash
curl -X POST https://api-sandbox.btcdirect.eu/api/v1/buy/quote \
-H "Content-Type: application/json" \
-H "Authorization: Bearer YOUR_TOKEN" \
-d '{
"currencyPair": "BTC-EUR",
"paymentMethod": "iDeal",
"fiatAmount": 100
}'
```
Try it out
Request a quote for a fiat-to-coin order. Requires a valid JWT token.
Base URL Sandbox (api-sandbox.btcdirect.eu) (https\://api-sandbox.btcdirect.eu) Authorization (partner JWT token) Bearer eyJ... Request body {
"currencyPair": "BTC-EUR",
"paymentMethod": "iDeal",
"fiatAmount": 100
}
POST /api/v1/buy/quote Copy as curl
Response
```
```
## Response
[Section titled “Response”](#response)
```json
{
"currencyPair": "BTC-EUR",
"fiatAmount": 100,
"cryptoAmount": 0.00123456,
"paymentMethodCost": 0.50,
"networkFeeCost": 1.25,
"btcdirectFee": 2.00,
"btcdirectFeePercentage": 2.0,
"partnerFee": 0.50,
"partnerFeePercentage": 0.5,
"totalCost": 100,
"singleCoinEstimate": 81000.00,
"paymentMethod": "iDeal",
"expiryDate": "2026-04-13T12:00:00Z"
}
```
The `expiryDate` indicates when the quote is no longer valid. After this time, you must request a new quote.
Note
Instead of `currencyPair`, you can use [CAIP-19](/general/caip19/) identifiers by providing `sourceCurrency` and `targetCurrency` as direct CAIP-19 strings in the request (e.g. `"sourceCurrency": "swift:0/iso4217:EUR"`). When both are present, `currencyPair` is derived automatically and ignored if also provided.
See the [endpoint specification](/api/v1/operations/post_app_v1_buy_quote_quote/) for the full request and response schema.
# Retrieving supported currencies
To get the full list of available currency pairs, including buy/sell status, minimum and maximum amounts, and chain information, you can retrieve them from the API.
This is useful for building currency selectors in your UI or for determining which `baseCurrency` and `quoteCurrency` values to use when requesting a quote or creating a checkout session.
## Prerequisites
[Section titled “Prerequisites”](#prerequisites)
You need a valid JWT token. See [Quick start: step 1](/unified-checkout/quick-start-buy/#step-1-authenticate) for how to authenticate.
## Endpoint
[Section titled “Endpoint”](#endpoint)
[`GET /api/v1/system/currency-pairs`](/api/v1/operations/get_app_v1_system_currencypairs_currencypairs/)
## Example
[Section titled “Example”](#example)
```bash
curl https://api-sandbox.btcdirect.eu/api/v1/system/currency-pairs \
-H "Authorization: Bearer YOUR_TOKEN"
```
Try it out
Retrieve all supported currency pairs. Requires a valid JWT token.
Base URL Sandbox (api-sandbox.btcdirect.eu) (https\://api-sandbox.btcdirect.eu) Authorization (partner JWT token) Bearer eyJ...
GET /api/v1/system/currency-pairs Copy as curl
Response
```
```
## Response
[Section titled “Response”](#response)
The response is an array of currency pairs. Each pair includes the cryptocurrency details, fiat currency, and buy/sell availability with min/max amounts.
```json
[
{
"currencyPair": "BTC-EUR",
"baseCurrency": {
"code": "BTC",
"ticker": "BTC",
"chain": null,
"name": "Bitcoin",
"decimals": 8,
"supportsTag": false,
"caip19": "bip122:000000000019d6689c085ae165831e93/slip44:0"
},
"quoteCurrency": {
"code": "EUR",
"name": "Euro",
"decimals": 2,
"caip19": "swift:0/iso4217:EUR"
},
"buy": {
"status": "enabled",
"min": { "amount": 30, "currencyCode": "EUR" },
"max": { "amount": 101000, "currencyCode": "EUR" }
},
"sell": {
"status": "enabled",
"min": { "amount": 0.00049878, "currencyCode": "BTC" },
"max": { "amount": 1.67958524, "currencyCode": "BTC" }
}
}
]
```
Use `baseCurrency.code` (e.g. `BTC`) and `quoteCurrency.code` (e.g. `EUR`) as the `currencyPair` (e.g. `BTC-EUR`) when requesting a quote or creating a checkout session. Alternatively, you can pass the `baseCurrency.caip19` and `quoteCurrency.caip19` values as `sourceCurrency` and `targetCurrency` strings instead. See [CAIP-19 support](/general/caip19/) for details.
The `supportsTag` field indicates whether the cryptocurrency requires a wallet address tag (destination tag or memo).
For a static overview, see [Supported currencies](/general/currencies/).
See the [endpoint specification](/api/v1/operations/get_app_v1_system_currencypairs_currencypairs/) for the full response schema.
# Retrieving payment methods
To show available payment methods in your UI, or to determine which method to use when creating a checkout session or requesting a quote, you can retrieve the list from the API.
Payment method availability depends on your partner configuration and the user’s country.
## Prerequisites
[Section titled “Prerequisites”](#prerequisites)
You need a valid JWT token. See [Quick start: step 1](/unified-checkout/quick-start-buy/#step-1-authenticate) for how to authenticate.
## Endpoint
[Section titled “Endpoint”](#endpoint)
[`GET /api/v1/buy/payment-methods/{type}`](/api/v1/operations/get_app_v1_buy_paymentmethods_paymentmethods/)
The `type` path parameter controls which payment methods are returned:
* `all`: returns every payment method available per country. Use this if you want to offer the full range of options.
* `preferred`: returns only the payment methods relevant to each country. Use this if you know the user’s country and want to show only what makes sense for them (e.g. iDEAL for Dutch users, Bancontact for Belgian users).
## Example
[Section titled “Example”](#example)
```bash
curl https://api-sandbox.btcdirect.eu/api/v1/buy/payment-methods/preferred \
-H "Authorization: Bearer YOUR_TOKEN"
```
Try it out
Retrieve all available payment methods. Requires a valid JWT token.
Base URL Sandbox (api-sandbox.btcdirect.eu) (https\://api-sandbox.btcdirect.eu) Authorization (partner JWT token) Bearer eyJ...
GET /api/v1/buy/payment-methods/all Copy as curl
Response
```
```
## Response
[Section titled “Response”](#response)
The response contains a flat list of payment methods and a separate list of countries with their available method codes.
```json
{
"paymentMethods": [
{
"code": "creditCard",
"label": "Credit Card",
"psp": "worldpay",
"limit": 1000,
"fee": {
"fixed": 0.5,
"percentage": 3
},
"expirationPeriod": 300,
"openInNewTab": false,
"context": []
},
{
"code": "bankTransfer",
"label": "Bank Transfer",
"psp": "bunq",
"limit": 10000,
"fee": {
"fixed": 0,
"percentage": 0
},
"expirationPeriod": 300,
"openInNewTab": false,
"context": []
}
],
"countries": {
"nl": ["iDeal", "creditCard", "bankTransfer"],
"be": ["bancontact", "creditCard", "bankTransfer"],
"fr": ["creditCard", "bankTransfer"]
}
}
```
Use the `code` value (e.g. `iDeal`, `creditCard`) when creating a checkout session or requesting a quote. Codes are case-sensitive.
The `countries` object maps lowercase country codes to the payment methods available in that country. Use this to filter the list based on the user’s location.
For a static overview of all payment method codes, see [Payment methods](/general/payment-methods/).
See the [endpoint specification](/api/v1/operations/get_app_v1_buy_paymentmethods_paymentmethods/) for the full response schema.
# Redirecting back to your application
After a user completes or cancels a payment on the BTC Direct checkout page, they can be redirected back to your application. You control this with the `returnUrl` field.
## How it works
[Section titled “How it works”](#how-it-works)
1. You include a `returnUrl` when creating the checkout session.
2. The user completes (or cancels) payment on the BTC Direct checkout page.
3. BTC Direct redirects the user back to your `returnUrl`.
## Setting the return URL
[Section titled “Setting the return URL”](#setting-the-return-url)
Pass the `returnUrl` field in your checkout request:
```json
{
"baseCurrency": "BTC",
"quoteCurrency": "EUR",
"paymentMethod": "creditCard",
"quoteCurrencyAmount": 50,
"walletAddress": "bc1...",
"returnUrl": "https://yourapp.com/order/complete"
}
```
The `returnUrl` is optional. If omitted, the user stays on the BTC Direct checkout page after completion.
## Deep linking into mobile apps
[Section titled “Deep linking into mobile apps”](#deep-linking-into-mobile-apps)
The `returnUrl` supports deep links, allowing you to redirect users back into your native mobile app after payment. Use your app’s custom URL scheme or universal link:
```json
{
"returnUrl": "yourapp://orders/complete"
}
```
Or with a universal link:
```json
{
"returnUrl": "https://yourapp.com/app/orders/complete"
}
```
Make sure your app is configured to handle the URL scheme or universal link on the target platform (iOS/Android).
## What happens on redirect
[Section titled “What happens on redirect”](#what-happens-on-redirect)
The user is redirected to your `returnUrl` as-is. No query parameters are appended by BTC Direct. To track which order the redirect belongs to, use the `partnerOrderIdentifier` field and encode it in your URL:
```json
{
"returnUrl": "https://yourapp.com/order/complete?ref=my-order-123",
"partnerOrderIdentifier": "my-order-123"
}
```
# Skipping the quote step
The `attemptDirectConfirm` field lets you skip the quote confirmation step in the checkout flow, landing the user directly on the order confirmation screen.
## Default behavior
[Section titled “Default behavior”](#default-behavior)
By default, `attemptDirectConfirm` is `false`. The checkout shows the user the quote (exchange rate, fees, total cost) and asks them to confirm before proceeding to payment.
## Skipping the quote screen
[Section titled “Skipping the quote screen”](#skipping-the-quote-screen)
Set `attemptDirectConfirm` to `true` to bypass the quote confirmation step:
```json
{
"baseCurrency": "BTC",
"quoteCurrency": "EUR",
"paymentMethod": "creditCard",
"quoteCurrencyAmount": 50,
"walletAddress": "bc1...",
"attemptDirectConfirm": true
}
```
**When to use:** you have already displayed the quote to the user in your own UI (for example using the [quote endpoint](/unified-checkout/requesting-a-quote/)) and the user has accepted the price before being redirected to checkout. Skipping the redundant confirmation step creates a smoother experience.
Note
This parameter only takes effect when the user is already logged in to their BTC Direct account within the checkout. If the user is not logged in, the checkout falls back to the standard quote confirmation flow.
# KYC sharing via SumSub
If your users have already completed identity verification (KYC) on your platform via [SumSub](https://sumsub.com/), you can pass their verification data to BTC Direct using a KYC share token. This allows users to skip re-verification on our platform.
## Prerequisites
[Section titled “Prerequisites”](#prerequisites)
* A working checkout integration. See [Quick start: buy (F2C)](/unified-checkout/quick-start-buy/).
* A SumSub integration on your platform that completes KYC for your users.
* Access to the [SumSub Share Token API](https://docs.sumsub.com/reference/share-token-generation).
## How it works
[Section titled “How it works”](#how-it-works)
1. Your platform completes KYC for the user via SumSub.
2. You generate a share token through the [SumSub Share Token API](https://docs.sumsub.com/reference/share-token-generation).
3. You pass the token in the [`POST /api/v2/buy/checkout`](/api/v2/operations/post_app_v2_buy_checkout_checkout/) request as `kycShareToken`.
4. The token is embedded in the checkout URL.
5. When the user registers on the BTC Direct checkout page, the token is used to import their existing KYC data.
Note
The SumSub share token is single-use. Once consumed during checkout registration, it cannot be reused. Generate a new token for each checkout session.
## Example
[Section titled “Example”](#example)
```bash
curl -X POST https://api-sandbox.btcdirect.eu/api/v2/buy/checkout \
-H "Content-Type: application/json" \
-H "Authorization: Bearer YOUR_TOKEN" \
-d '{
"baseCurrency": "BTC",
"quoteCurrency": "EUR",
"paymentMethod": "creditCard",
"quoteCurrencyAmount": 50,
"walletAddress": "bc1...",
"kycShareToken": "_act-sbx-jwt-your-token"
}'
```
Try it out
Create a checkout session with a KYC share token.
Base URL Sandbox (api-sandbox.btcdirect.eu) (https\://api-sandbox.btcdirect.eu) Authorization (partner JWT token) Bearer eyJ... Request body {
"baseCurrency": "BTC",
"quoteCurrency": "EUR",
"paymentMethod": "creditCard",
"quoteCurrencyAmount": 50,
"walletAddress": "bc1...",
"kycShareToken": "\_act-sbx-jwt-your-token"
}
POST /api/v2/buy/checkout Copy as curl
Response
```
```
The token will appear as a query parameter in the returned `checkoutUrl`. You do not need to handle it further. The checkout page processes it automatically during user registration.
## Requirements
[Section titled “Requirements”](#requirements)
* The share token must be generated from a SumSub applicant that has been **approved** (verification level: `individual`).
* Only individual KYC is supported. KYB (business verification) share tokens are not supported.
* The token is validated by SumSub when consumed. Expired, invalid, or already-used tokens are silently ignored. The user will go through standard verification instead.
| Scenario | Result |
| -------------------------- | --------------------------------------------------------------------------------------- |
| Valid share token provided | User’s KYC data is imported at registration. Verification steps are skipped or reduced. |
| Invalid or expired token | Token is ignored. User goes through standard KYC verification. |
| No token provided | Standard flow. No change in behavior. |
Caution
Share tokens should be treated as sensitive data. Generate them server-side and do not expose them in client-side code. The share token is not included in the HMAC signature. It is a self-protecting, single-use token validated by SumSub.
See the [checkout endpoint specification](/api/v2/operations/post_app_v2_buy_checkout_checkout/) for the full request schema.
# Tracking orders
After creating a checkout session, you may want to track the status of the order in your own system. There are two mechanisms for this: the partner order identifier and webhooks.
## Partner order identifier
[Section titled “Partner order identifier”](#partner-order-identifier)
Pass a `partnerOrderIdentifier` when creating the checkout session to link the BTC Direct order to your internal reference:
```json
{
"baseCurrency": "BTC",
"quoteCurrency": "EUR",
"paymentMethod": "creditCard",
"quoteCurrencyAmount": 50,
"walletAddress": "bc1...",
"partnerOrderIdentifier": "your-internal-order-id-123"
}
```
This identifier is included in all [webhook](/general/webhooks/) notifications for this order, making it easy to correlate events with your system.
## Webhooks
[Section titled “Webhooks”](#webhooks)
To receive real-time status updates on orders, set up webhooks. BTC Direct sends HTTP POST requests to your configured endpoint when events occur (order created, paid, completed, cancelled, etc.).
Contact your account manager to configure webhooks for your account. See [Webhooks](/general/webhooks/) for the full list of events and how to verify signatures.
## Recommended approach
[Section titled “Recommended approach”](#recommended-approach)
1. Generate a unique identifier in your system before creating the checkout.
2. Pass it as `partnerOrderIdentifier` in the checkout request.
3. Set up webhooks to receive order status updates with your identifier included.
# Wallet address visibility
The `showWalletAddress` field controls whether the wallet address is visible to the user on the checkout page.
## Default behavior
[Section titled “Default behavior”](#default-behavior)
By default, `showWalletAddress` is `true` and the wallet address is shown on the checkout page. The user can see where their cryptocurrency will be sent.
## Hiding the wallet address
[Section titled “Hiding the wallet address”](#hiding-the-wallet-address)
Set `showWalletAddress` to `false` to hide the wallet address from the checkout page:
```json
{
"baseCurrency": "BTC",
"quoteCurrency": "EUR",
"paymentMethod": "creditCard",
"quoteCurrencyAmount": 50,
"walletAddress": "bc1...",
"showWalletAddress": false
}
```
**When to use:** your platform manages wallet addresses on behalf of the user and showing the raw address would be confusing or unnecessary. For example, if your app generates deposit addresses internally and the user does not need to verify them.
Caution
Even when hidden, the `walletAddress` field is still required in the request and the cryptocurrency is still sent to that address. Hiding it only affects the checkout page display.
# What are widgets?
BTC Direct widgets are embeddable components that you can integrate into your website to offer cryptocurrency buy and sell functionality to your users. The widgets handle the entire order flow, including user onboarding, payment processing, and order management.
## Available widgets
[Section titled “Available widgets”](#available-widgets)
| Widget | Description |
| -------------------------------------------- | --------------------------------------------- |
| [Buy (F2C)](/widget/buy/) | Allows users to buy cryptocurrency with fiat |
| [Sell (C2F)](/widget/sell/) | Allows users to sell cryptocurrency for fiat |
| [Transaction history](/widget/transactions/) | Shows order history for the user |
| [Onboarding](/widget/onboarding/) | Handles KYC and user verification |
| [DCA](/widget/dca/) | Dollar cost averaging for recurring purchases |
## How it works
[Section titled “How it works”](#how-it-works)
1. Embed the widget JavaScript on your page
2. Configure it with your API key
3. The widget renders in a target element on your page
4. Users complete their orders within the widget
5. You receive callbacks when orders are completed
See [Getting started](/widget/getting-started/) for step-by-step integration instructions.
# Buy widget (F2C)
The buy widget allows users to purchase cryptocurrency with fiat currency directly from your website. It handles the entire order flow including currency selection, amount input, payment method selection, and payment processing.
## Implementing the widget
[Section titled “Implementing the widget”](#implementing-the-widget)
Embed the following script to load the buy widget from the BTC Direct CDN:
```html
```
Make sure you have [set up your API key](/widget/getting-started/#step-2-set-api-key) and [added the stylesheet](/widget/getting-started/#optional-add-stylesheet).
## Wallet addresses
[Section titled “Wallet addresses”](#wallet-addresses)
The widget requires wallet addresses to be provided so the user can select where to receive their cryptocurrency. See [Provide wallet addresses](/widget/buy/wallet-addresses/) for details.
## Init parameters
[Section titled “Init parameters”](#init-parameters)
In addition to the [shared init parameters](/widget/getting-started/#init-call-options/), the buy widget supports:
| Key | Type | Description | Default |
| :--------------------------- | :-------- | :----------------------------------------------------------------------------------------------------------------- | :--------------- |
| `returnUrl` | `string` | URL the user returns to after being redirected to a BTC Direct page. | Current page URL |
| `useSameWindowForPayment` | `boolean` | Set to `false` to open the payment page in a new window. | `true` |
| `walletConfirmationRequired` | `boolean` | If true, the widget emits a confirmation event before completing the order. Used for hardware wallet integrations. | `false` |
## Next steps
[Section titled “Next steps”](#next-steps)
* [Parameters](/widget/buy/parameters/): prefill and control the order form
* [Events](/widget/buy/events/): respond to order confirmations and wallet verifications
# Buy widget: events
The buy widget emits events that your application can listen to. Use the native `window.addEventListener` to handle them:
```js
window.addEventListener('EVENT_NAME', (event) => {
// The data sent by the widget is in event.detail
});
```
Replace `EVENT_NAME` with the event names described below.
## Order confirmed
[Section titled “Order confirmed”](#order-confirmed)
Emitted when the user confirms their order and is about to be redirected to the payment page.
**Event name:** `btcdirect-embeddable-fiat-to-coin-order-confirmed`
```js
// event.detail:
{
currencyCode: 'iso:EUR',
exchangeAmount: 100,
orderId: '123456789'
}
```
| Field | Description |
| :--------------- | :------------------------- |
| `currencyCode` | The fiat currency code |
| `exchangeAmount` | The fiat amount being paid |
| `orderId` | The order ID |
## Wallet confirmation requested
[Section titled “Wallet confirmation requested”](#wallet-confirmation-requested)
Emitted when `walletConfirmationRequired` is set to `true` in the init call. Your application should verify the wallet address (e.g. on a hardware wallet) and then confirm or cancel.
**Event name:** `btcdirect-embeddable-wallet-address-confirmation-requested`
```js
// event.detail:
{
id: '123456789'
}
```
The `id` matches the wallet ID from [Provide wallet addresses](/widget/buy/wallet-addresses/).
### Confirming the wallet
[Section titled “Confirming the wallet”](#confirming-the-wallet)
```js
btcdirect('wallet-address-confirmation', { address: 'user-wallet-address' });
```
### Canceling the confirmation
[Section titled “Canceling the confirmation”](#canceling-the-confirmation)
Returns the user to the order form:
```js
btcdirect('wallet-address-confirmation-canceled');
```
## Callback statuses
[Section titled “Callback statuses”](#callback-statuses)
If a `callbackUrl` is configured, the following statuses are sent as query parameters (`?orderId=123&status=success`):
| Status | Description |
| :---------- | :------------------------------------------------ |
| `success` | The order has been processed successfully. |
| `expired` | The payment window has expired. |
| `cancelled` | The order was canceled by the user. |
| `denied` | The payment was denied (e.g. insufficient funds). |
| `failed` | The order failed for unknown reasons. |
# Buy widget: parameters
You can prefill and control the buy widget by calling `set-parameters` after initialization.
## Set parameters
[Section titled “Set parameters”](#set-parameters)
```js
btcdirect('set-parameters', {
baseCurrency: 'BTC',
quoteCurrency: 'EUR',
baseCurrencyAmount: 0.001,
quoteCurrencyAmount: 123,
paymentMethod: 'creditCard',
walletAddress: '3FZbgi29cpjq2GjdwV8eyHuJJnkLtktZc5',
walletAddressTag: '1513155290',
signature: '67890fghij',
returnUrl: 'https://example.com',
callbackUrl: 'https://example.com/callback',
partnerOrderIdentifier: '12345abcde',
fee: 0.5,
expiryDateTime: 1701423182,
fixedAmount: true,
fixedCurrency: true,
fixedPaymentMethod: true,
showWalletAddress: true
});
```
All parameters are optional. Only provide the fields you want to prefill.
| Key | Type | Description |
| :----------------------- | :-------- | :--------------------------------------------------------------------------------- |
| `baseCurrency` | `string` | The cryptocurrency to preselect |
| `quoteCurrency` | `string` | The fiat currency to preselect |
| `baseCurrencyAmount` | `number` | The crypto amount to prefill |
| `quoteCurrencyAmount` | `number` | The fiat amount to prefill |
| `paymentMethod` | `string` | The payment method to preselect. See [payment methods](/general/payment-methods/). |
| `walletAddress` | `string` | The wallet address of the user |
| `walletAddressTag` | `string` | The destination tag of the wallet (if applicable) |
| `signature` | `string` | Signature from an offer API call (see below) |
| `returnUrl` | `string` | URL to return to when clicking “Back to partner” |
| `callbackUrl` | `string` | URL where order status updates are sent |
| `partnerOrderIdentifier` | `string` | Your order ID |
| `fee` | `number` | A specific fee for this order (as a percentage) |
| `expiryDateTime` | `string` | Unix timestamp from an offer API call (see below) |
| `fixedAmount` | `boolean` | Lock the amounts so they cannot be changed |
| `fixedCurrency` | `boolean` | Lock the currencies so they cannot be changed |
| `fixedPaymentMethod` | `boolean` | Lock the payment method so it cannot be changed |
| `showWalletAddress` | `boolean` | Show or hide the wallet address of the user |
Caution
When providing any of the following parameters, `signature` becomes required: `walletAddress`, `fee`, `returnUrl`, `callbackUrl`.
Note
If both `baseCurrencyAmount` and `quoteCurrencyAmount` are set, only `quoteCurrencyAmount` is used.
## Offer API parameters
[Section titled “Offer API parameters”](#offer-api-parameters)
The `signature` and `expiryDateTime` parameters come from the [Unified Checkout](/unified-checkout/) API response. Providing them ensures the same offer is used for the order.
## Other method calls
[Section titled “Other method calls”](#other-method-calls)
### Set locale
[Section titled “Set locale”](#set-locale)
```js
btcdirect('locale', { locale: 'en-GB' });
```
### Set currencies
[Section titled “Set currencies”](#set-currencies)
```js
btcdirect('currencies', { crypto: 'BTC', fiat: 'EUR' });
```
### Lock cryptocurrency
[Section titled “Lock cryptocurrency”](#lock-cryptocurrency)
```js
btcdirect('currencies', { crypto: 'ETH', fiat: 'EUR' });
btcdirect('lock-cryptocurrency', { lockCryptocurrency: true });
```
### Prefill order
[Section titled “Prefill order”](#prefill-order)
```js
btcdirect('order', {
crypto: 'LTC',
fiat: 'EUR',
amount: 1,
type: 'crypto' // or 'fiat'
});
```
### Set payment method
[Section titled “Set payment method”](#set-payment-method)
```js
btcdirect('payment-method', { method: 'iDeal' });
```
### Set callback URL
[Section titled “Set callback URL”](#set-callback-url)
```js
btcdirect('callback', { callbackUrl: 'https://example.com/callback' });
```
### Skip the order form
[Section titled “Skip the order form”](#skip-the-order-form)
Skips the order form if all required data is provided (amount, currency, wallet address, payment method):
```js
btcdirect('attempt-direct-confirm', { enableAttemptDirectConfirm: true });
```
### Include DCA tab
[Section titled “Include DCA tab”](#include-dca-tab)
Adds a Dollar Cost Averaging tab to the buy widget:
```js
btcdirect('include-dca', { include: true });
```
### Set partner order identifier
[Section titled “Set partner order identifier”](#set-partner-order-identifier)
```js
btcdirect('partner-order-identifier', { partnerOrderIdentifier: '12345abcde' });
```
# Provide wallet addresses
The examples below show the methods available to add one or multiple addresses.
## Provide a single address
[Section titled “Provide a single address”](#provide-a-single-address)
The below example provides the widget with a single wallet address for Bitcoin.
```js
// JavaScript from previous code example
btcdirect('init', { token: 'API_KEY' });
btcdirect('wallet-addresses', {
addresses: {
address: 'mipcBbFg9gMiCh81Kj8tqqdgoZub1ZJRfn',
currency: 'BTC',
id: '123456789',
name: 'My wallet'
}
});
```
Note that the *id* is optional and is only required when setting the wallet confirmation setting to true. See Optional init call parameters for more information. The wallet name is also optional and provides the user with more clear information on the wallet they are selecting.
## Provide multiple addresses
[Section titled “Provide multiple addresses”](#provide-multiple-addresses)
The below example provides 3 addresses. Two are for Bitcoin and one for Ripple.
```js
// JavaScript from previous code example
btcdirect('init', { token: 'API_KEY' });
btcdirect('wallet-addresses', {
addresses: [
{
address: 'mipcBbFg9gMiCh81Kj8tqqdgoZub1ZJRfn',
currency: 'BTC'
},
{
address: 'n1sBtodW8oz8xjwZGcZnLVoRrbQK3My8Vb',
currency: 'BTC'
},
{
address: 'rG1QQv2nh2gr7RCZ1P8YYcBUKCCN633jCn',
currency: 'XRP',
destinationTag: '123456'
}
]
});
```
## Provide selected wallet address
[Section titled “Provide selected wallet address”](#provide-selected-wallet-address)
If a wallet address was already preselected in your application, you can provide this as the default selected value in the widget.
```js
// JavaScript from previous code example
btcdirect('init', { token: 'API_KEY' });
btcdirect('wallet-address-selected', {
addresses: {
address: 'mipcBbFg9gMiCh81Kj8tqqdgoZub1ZJRfn',
}
});
```
## Considerations when providing wallet addresses
[Section titled “Considerations when providing wallet addresses”](#considerations-when-providing-wallet-addresses)
The wallet addresses (for example **mipcBbFg9gMiCh81Kj8tqqdgoZub1ZJRfn**) are example addresses and need to be replaced with the wallet address of the user. The cryptocurrency that it belongs to (for example **BTC**) needs to be replaced with the actual cryptocurrency abbreviation (also known as the ticker) this address belongs to.
When providing a wallet address for Ripple, and only for Ripple, you can optionally provide a destination tag (for example **123456**). This is not mandatory however as not all Ripple wallet addresses require a destination tag.
Note that the wallet addresses that are provided affect the cryptocurrencies that can be selected. So if only one address for Bitcoin is provided, the only option to select in the “Choose a coin”-section will be Bitcoin. When providing addresses for multiple cryptocurrencies, the available cryptocurrencies will be selectable.
When using the sandbox environment () all provided wallet addresses need to be mainnet wallet addresses. Do not use testnet addresses. When using the production environment these need to be production wallet addresses.
List of [available cryptocurrencies](/general/currencies/) in our widget.
# Common questions and issues
## Multiple widgets in one page
[Section titled “Multiple widgets in one page”](#multiple-widgets-in-one-page)
When using multiple widgets in a single page only a few minor changes are needed. In the following example code, these are mentioned in the comments.
```html
```
Now we have to widget calls in the page they need individual target elements in order to display them. These have classes added to them that match the `selector`-values in the above code example.
```html
```
If everything is done correctly, it should result in the following:
## CORS Errors
[Section titled “CORS Errors”](#cors-errors)
When calls from the widget result in CORS-related errors, this is usually caused by the containing website’s referrer policy. Make sure that the referrer header is present in the call headers and it’s not empty.
Sometimes this is caused by external packages such as “helmet” and “nuxt-helmet”. In these cases the referrer can be enabled in the package settings.
## Is there support for iFrames?
[Section titled “Is there support for iFrames?”](#is-there-support-for-iframes)
We do not support iFrames, nor do we plan to.
## Why don’t you support iFrames?
[Section titled “Why don’t you support iFrames?”](#why-dont-you-support-iframes)
Our widgets are designed to be embedded directly into the website. We don’t offer iFrames for our widget/unified checkout due to security concerns and the need for a fully controlled, secure payment environment.
# DCA widget
This document describes the steps to take in order to embed the BTC Direct dollar cost average form widget in another website. It is aimed at developers that will implement this functionality.
## Implementing the widget
[Section titled “Implementing the widget”](#implementing-the-widget)
In order to enable the widget in your website, the following script needs to be embedded. This script loads the widget from the BTC Direct CDN (Content Delivery Network) and initializes it automatically.
```html
```
If [a valid key is provided](/widget/getting-started/#step-2-set-api-key), and [the styling is added](/widget/getting-started/#optional-add-stylesheet), it will result in the following:
Note that there is a starting screen by default. There is a setting that shows the overview as the starting page instead. This can be done with the `startInOverview` setting that is described in the [parameters page](/widget/dca/parameters).
## Important: provide wallet address(es)
[Section titled “Important: provide wallet address(es)”](#important-provide-wallet-addresses)
When navigating to the next page using the “Get started” button you may notice that the dropdown for wallet addresses is empty. This is because the widget expects the user’s [wallet addresses to be provided](/widget/buy/wallet-addresses/) in order to select them.
# DCA widget: parameters
## Optional init call parameters
[Section titled “Optional init call parameters”](#optional-init-call-parameters)
The init call, as described in [Getting Started](/widget/getting-started/), can contain several key-value pairs to fine-tune the widget. The different options are described below.
| Key | Type | Description | Default |
| :---------------- | :-------- | :-------------------------------------------------------------------------------------------------------------------------- | :------ |
| `startInOverview` | `boolean` | If it is preferred to show an overview of the user’s DCA plans instead of the start page, you can set this value to `true`. | `false` |
All widgets support [`selector`, `debug`, `locale` and `theme`](/widget/getting-started/#init-call-options).
## Additional calls to the widget
[Section titled “Additional calls to the widget”](#additional-calls-to-the-widget)
The widget accepts several calls to it with which additional information can be provided. These can be added to the script tag that loads the widget.
### Locale
[Section titled “Locale”](#locale)
This call sets the locale for the application. This determines the way monetary values are displayed. For example 0 Euro’s in the EN-GB locale is displayed as “€0.00” whereas the NL-NL locale results in ”€ 0,00”.
```js
btcdirect('locale', { locale: 'en-GB' });
```
# Getting started
The widgets have been designed to require as little configuration as possible. **The initial script can be copied and pasted and only an “API\_KEY” has to be configured.** It’s similar to the script needed for Google Tag Manager making it recognizable and easy to implement. This code loads and initializes the widget on the desired webpage.
After the initial setup the widgets accept [init call parameters](/widget/getting-started/#init-call-options) to configure and extend its functionality. Method calls are queued and executed on **‘first come, first served’** basis after a widget’s initialization. We can interact with a widget by performing method calls after initialization. These method calls will be invoked immediately instead of being queued.
## Step. 1: Embed the widget
[Section titled “Step. 1: Embed the widget”](#step-1-embed-the-widget)
In order to enable the widget in your website, the following script needs to be embedded. This script loads the widget from the BTC Direct CDN (Content Delivery Network) and initializes it automatically.
```html
```
## Step. 2: Set API key
[Section titled “Step. 2: Set API key”](#step-2-set-api-key)
In this script you can find the variable **API\_KEY**. This variable needs to be replaced by the API key that is provided by BTC Direct. This key is used to identify you as a partner. If you haven’t received your API key yet, please contact your account manager.
### Init call options
[Section titled “Init call options”](#init-call-options)
The `init` call accepts additional options to configure the widget:
| Key | Type | Description | Default |
| :--------- | :-------- | :----------------------------------------------------------------- | :------------------ |
| `token` | `string` | Your API key (required) | : |
| `selector` | `string` | CSS selector of the HTML element to bind the widget to. | `.btcdirect-widget` |
| `debug` | `boolean` | Enables extra console logging. Recommended for development. | `false` |
| `locale` | `string` | The locale for formatting monetary values (e.g. `en-GB`, `nl-NL`). | `en-GB` |
| `theme` | `string` | Styling theme: `light` or `dark`. | `light` |
Each widget type may support additional init parameters. See the widget-specific documentation for details.
## Step. 3: Set widget CDN domain
[Section titled “Step. 3: Set widget CDN domain”](#step-3-set-widget-cdn-domain)
If the variable **WIDGET\_CDN\_URL** is present in the embedded script it needs to be replaced. You can skip this step if it is not present.
In our examples `https://cdn.btcdirect.eu/` is the location where the widget’s source is retrieved from. When developing, it is recommended to change this to `https://cdn-sandbox.btcdirect.eu/`. This is our sandbox environment and it simulates the functionality of the production environment without using actual currency.
Valid options for **WIDGET\_CDN\_URL** are:
* [Buy order form (F2C)](/widget/buy/)
* `https://cdn.btcdirect.eu/fiat-to-coin/fiat-to-coin.js`
* `https://cdn-sandbox.btcdirect.eu/fiat-to-coin/fiat-to-coin.js`
* [Sell widget (C2F)](/widget/sell/)
* `https://cdn.btcdirect.eu/coin-to-fiat/coin-to-fiat.js`
* `https://cdn-sandbox.btcdirect.eu/coin-to-fiat/coin-to-fiat.js`
* [Transaction history](/widget/transactions/)
* `https://cdn.btcdirect.eu/transaction-history/transaction-history.js`
* `https://cdn-sandbox.btcdirect.eu/transaction-history/transaction-history.js`
* [Onboarding](/widget/onboarding/)
* `https://cdn.btcdirect.eu/onboarding/onboarding.js`
* `https://cdn-sandbox.btcdirect.eu/onboarding/onboarding.js`
* [DCA](/widget/dca/)
* `https://cdn.btcdirect.eu/dollar-cost-average/dollar-cost-average.js`
* `https://cdn-sandbox.btcdirect.eu/dollar-cost-average/dollar-cost-average.js`
## Step. 4: Add target element
[Section titled “Step. 4: Add target element”](#step-4-add-target-element)
In order for the widget to render itself, an element needs to be added to the page. By default it looks for an element with the class `btcdirect-widget`.
```html
```
## Step. 5: Result
[Section titled “Step. 5: Result”](#step-5-result)
If you are implementing the [Buy order form (F2C)](/widget/buy/) widget, a valid key is provided and the styling is added. It will result in the following:
Checkout the other widgets for more examples!
## Optional: add stylesheet
[Section titled “Optional: add stylesheet”](#optional-add-stylesheet)
A default stylesheet has been created to provide a responsive layout and gives the widget a BTC Direct look-and-feel. In order to add the styling, a tag has to be added to your page, preferably inside the `` tag.
```html
```
Valid options for stylesheets are:
* [Buy order form (F2C)](/widget/buy/)
* `https://cdn.btcdirect.eu/fiat-to-coin/fiat-to-coin.css`
* [Sell widget (C2F)](/widget/sell/)
* `https://cdn.btcdirect.eu/coin-to-fiat/coin-to-fiat.css`
* [Transaction history](/widget/transactions/)
* `https://cdn.btcdirect.eu/transaction-history/transaction-history.css`
* [Onboarding](/widget/onboarding/)
* `https://cdn.btcdirect.eu/onboarding/onboarding.css`
* [DCA](/widget/dca/)
* `https://cdn.btcdirect.eu/dollar-cost-average/dollar-cost-average.css`
The styling utilizes the `btcdirect-widget-container` class as its starting point for the styling. So if you want to change the target element’s identifier but still use the styling, add the identifier to it instead of replacing the classname. For example:
```html
```
## iFrames
[Section titled “iFrames”](#iframes)
We do not support iFrames. For more details, please refer to the [FAQ section](/widget/common-questions-and-issues/#is-there-support-for-iframes).
# Onboarding widget
This document describes the steps to take in order to embed the BTC Direct onboarding form widget in another website. It is aimed at developers that will implement this functionality.
## Implementing the widget
[Section titled “Implementing the widget”](#implementing-the-widget)
In order to enable the widget in your website, the following script needs to be embedded. This script loads the widget from the BTC Direct CDN (Content Delivery Network) and initializes it automatically.
```html
```
If [a valid key is provided](/widget/getting-started/#step-2-set-api-key), and [the styling is added](/widget/getting-started/#optional-add-stylesheet), it will result in the following:
## Optional init call parameters
[Section titled “Optional init call parameters”](#optional-init-call-parameters)
The init call, as described in [Getting Started](/widget/getting-started/), can contain several key-value pairs to fine-tune the widget. The different options are described below.
| Key | Type | Description | Default |
| :--------------- | :------- | :-------------------------------------------------------------------------------------------------------------------------------------------------- | :--------------------- |
| `returnUrl` | `string` | The url that the user is redirected to after completing the onboarding process. | |
| `userIdentifier` | `string` | The identifier with which the user can automatically login after account creation. If no identifier is provided, one will be created by the widget. | Created by the widget |
All widgets support [`selector`, `debug`, `locale` and `theme`](/widget/getting-started/#init-call-options).
## Additional calls to the widget
[Section titled “Additional calls to the widget”](#additional-calls-to-the-widget)
The widget accepts several calls to it with which additional information can be provided. These can be added to the script tag that loads the widget.
### Locale
[Section titled “Locale”](#locale)
This call sets the locale for the application. This determines the way monetary values are displayed. For example 0 Euro’s in the EN-GB locale is displayed as “€0.00” whereas the NL-NL locale results in ”€ 0,00”.
```js
btcdirect('locale', { locale: 'en-GB' });
```
# Sell widget (C2F)
This document describes the steps to take in order to embed the BTC Direct sell order form widget in another website. It is aimed at developers that will implement this functionality.
## Implementing the widget
[Section titled “Implementing the widget”](#implementing-the-widget)
In order to enable the widget in your website, the following script needs to be embedded. This script loads the widget from the BTC Direct CDN (Content Delivery Network) and initializes it automatically.
```html
```
If [a valid key is provided](/widget/getting-started/#step-2-set-api-key), and [the styling is added](/widget/getting-started/#optional-add-stylesheet), it will result in the following:
## Optional init call parameters
[Section titled “Optional init call parameters”](#optional-init-call-parameters)
The init call, as described in [Getting Started](/widget/getting-started/), can contain several key-value pairs to fine-tune the widget. The different options are described below.
| Key | Type | Description | Default |
| :------------------------ | :-------- | :----------------------------------------------------------------------------------------------------------------------------------------------- | :------------------------------------------------ |
| `returnUrl` | `string` | The url that is used in some places in the widget once the user is redirected to a specific external page of BTC Direct. | The url of the page that the widget is loaded in. |
| `useSameWindowForPayment` | `boolean` | Setting this to `false` opens the IBAN verification page in a new window instead of navigating the current window to the IBAN verification page. | `true` |
All widgets support [`selector`, `debug`, `locale` and `theme`](/widget/getting-started/#init-call-options).
## Optional: provide wallet address(es)
[Section titled “Optional: provide wallet address(es)”](#optional-provide-wallet-addresses)
If you provide the widget with [wallet addresses](/widget/buy/wallet-addresses/), it will require the user to select a wallet address in order to submit the form. The above preview has (demo) addresses provided and therefore shows the wallet address selector accordingly.
Wallet addresses are optional and not required, if you don’t provide them the address selector will not be shown.
> The selected wallet address will be available to you through an emitted event, which you can read more about in [Sell widget: events](/widget/sell/events/)
# Sell widget: events
The sell widget emits events that your application can listen to. Use the native `window.addEventListener` to handle them:
```js
window.addEventListener('EVENT_NAME', (event) => {
// The data sent by the widget is in event.detail
});
```
Replace `EVENT_NAME` with the event names described below.
## Order confirmation requested
[Section titled “Order confirmation requested”](#order-confirmation-requested)
When a user confirms his order in the order form, the widget provides the order details so that an actual transaction on the chain can be created.
Event name: `btcdirect-embeddable-coin-to-fiat-order-requested`
```js
// event.detail:
{
currency: 'BTC', // The cryptocurrency ticker
amount : 0.1, // The crypto amount that will be sold
orderId: 123456, // The ID of the order
}
```
If you’ve provided wallet addresses to the widget, as mentioned in [Provide wallet address(es)](/widget/buy/wallet-addresses/), the necessary information will be part of the event:
```js
// event.detail:
{
currency: 'BTC', // The cryptocurrency ticker
amount : 0.1, // The crypto amount that will be sold
walletAddress: 'abc12', // The address to send the coins to
destinationTag: '123456', // Optional destination tag (only for XRP orders)
orderId: 123456, // The ID of the order
userWalletAddress: 'def34'; // The wallet address of the user
}
```
# Sell widget: parameters
The widget accepts several calls to it with which additional information can be provided. These can be added to the script tag that loads the widget.
## Currencies
[Section titled “Currencies”](#currencies)
This call sets the selected currencies for the widget. This is for both the cryptocurrency and the fiat currency. The provided values result in these currencies being selected in the order form as initial values.
```js
btcdirect('currencies', { crypto: 'BTC', fiat: 'EUR' });
```
* Available values for cryptocurrency: [List of supported cryptocurrencies](/general/currencies/)
* Available values for fiat: [List of supported fiat currencies](/general/currencies/)
## Lock cryptocurrency
[Section titled “Lock cryptocurrency”](#lock-cryptocurrency)
This call makes the currency select box “read-only” and locks the selected cryptocurrency. This prevents customers from changing the coin through the currency select box in the widget.
```js
// Preselect the desired currency to make sure you lock the preferred coin
btcdirect('currencies', { crypto: 'ETH', fiat: 'EUR' });
btcdirect('lock-cryptocurrency', { lockCryptocurrency: true });
```
## Order information
[Section titled “Order information”](#order-information)
It is possible to set up the basic information of an order, making it easier for your users to purchase crypto as most of the form will be pre-filled. In order to do this you can provide both currencies of the order (crypto and fiat), the order amount and if it is a fiat amount or crypto amount.
```js
// JavaScript from previous code example
btcdirect('init', { token: 'API_KEY' });
btcdirect('order', {
crypto: 'LTC',
fiat: 'EUR',
amount: 1,
type: 'crypto'
});
```
* Available values for type: `crypto` and `fiat`
* Available values for cryptocurrency: [List of supported cryptocurrencies](/general/currencies/)
* Available values for fiat: [List of supported fiat currencies](/general/currencies/)
## Locale
[Section titled “Locale”](#locale)
This call sets the locale for the application. This determines the way monetary values are displayed. For example 0 Euro’s in the EN-GB locale is displayed as “€0.00” whereas the NL-NL locale results in ”€ 0,00”.
```js
btcdirect('locale', { locale: 'en-GB' });
```
## Callback url
[Section titled “Callback url”](#callback-url)
This call sets a callback url to which the result of the order is communicated. For example when setting the url to it will be called after an order has been completed. The status and ID of the order are added as query parameters, such as `?orderId=123456&status=success`. This enables your website to catch the status of the order and display information accordingly.
```js
btcdirect('callback', { callbackUrl: 'https://btcdirect.eu' });
```
The following values can be returned by the process, according to the status of the order:
| Status | Description |
| :-------- | :-------------------------------------------------------------------------------------------------------------------------------- |
| success | The order has been processed successfully. |
| expired | The order’s payment window has expired. Therefore the order is stopped. |
| cancelled | The order has been canceled by the user. |
| denied | The order has been denied by the payment provider. This is usually when a user tries to pay for an order with insufficient funds. |
| failed | The order has failed for unknown reasons. |
## Transaction confirmation
[Section titled “Transaction confirmation”](#transaction-confirmation)
This call is needed in order to fully complete the order. When the user has provided the needed data in the widget, an event is emitted from the widget to your application with data to create a transaction on the selected chain. This emitted event is described in [Sell widget: events](/widget/sell/events/). Once the transaction is broadcasted and a transaction ID is available, it can be supplied to the widget which will add it to the order to finalize the process.
```js
btcdirect('transaction-id-confirmation', {
orderId: '123456',
transactionId: 'abcdef-123456789'
});
```
### Canceling transaction confirmation
[Section titled “Canceling transaction confirmation”](#canceling-transaction-confirmation)
If for some reason the transaction cannot be continued (for example when the wallet doesn’t have enough funds) or the user cancels the process the transaction can be canceled.
```js
btcdirect('coin-to-fiat-order-canceled');
```
# Transaction history widget
This document describes the steps to take in order to embed the BTC Direct trade history widget in another website. It is aimed at developers that will implement this functionality.
## Implementing the widget
[Section titled “Implementing the widget”](#implementing-the-widget)
In order to enable the widget in your website, the following script needs to be embedded. This script loads the widget from the BTC Direct CDN (Content Delivery Network) and initializes it automatically.
```html
```
If [a valid key is provided](/widget/getting-started/#step-2-set-api-key), and [the styling is added](/widget/getting-started/#optional-add-stylesheet), it will result in the following:
Note that if the user is not logged in, the login form will be displayed instead.
## Optional init call parameters
[Section titled “Optional init call parameters”](#optional-init-call-parameters)
The init call, as described in [Getting Started](/widget/getting-started/), can contain several key-value pairs to fine-tune the widget. The different options are described [here](/widget/getting-started/#init-call-options).
## Additional calls to the widget
[Section titled “Additional calls to the widget”](#additional-calls-to-the-widget)
The widget accepts several calls to it with which additional information can be provided. These can be added to the script tag that loads the widget.
### Locale
[Section titled “Locale”](#locale)
This call sets the locale for the application. This determines the way monetary values are displayed. For example 0 Euro’s in the EN-GB locale is displayed as “€0.00” whereas the NL-NL locale results in ”€ 0,00”.
```js
btcdirect('locale', { locale: 'en-GB' });
```